10.21.2012

6PAC Piece # 1 - Jumpsuit

Started my 6PAC... my Jumpsuit


I will just keep adding to this post as my 6PAC progresses.  So far I am going to start with my perceived hardest piece.  The jumpsuit.  KwikSew # 3898 View B. My fabric: Purple & Black  Poly/Rayon/Knit.  I am still learning about my fabrics, so unless I remember what the bolt said, I can only describe what I THINK the material feels like to me.  I am hoping this material is suitable for this jumpsuit and will not just hang with too much gravity and have no shape to it when I'm done.  This is the jumpsuit that I wanted to do about a year ago, and never got to. the 6PAC has given me life and I've out this back to the front burner to challenge myself to get'er done.


10/21/12:  So here goes my 6PAC Adventure.  Started yesterday by cutting the pattern out.  I'm going with Size S because I made a Kwik Sew overalls last year in size M and they were huge! so I'm thinking these pattern run large.  I hope!

Step One - The cutting of the Pattern


Step Two - Iron the pattern pieces
 
Step 3 - lay the pieces out and pin and then cut fabric - better line up that leg better - sure doesn't look like the grain line is true, does it?  :-)
 
So guess what??? I got the pieces cut but I pulled a muscle in my back with all that leaning over pinning and cutting both the pattern and the material, so now the rest of the day I was on bed rest and I'm laid up today again!!!! So my start is stopped!
 
Well It's football Sunday today anyway, but, my back being out is no fun, no matter what!  I had to go shopping this morning, but that was tough so i only got the basics, and DH will only get a light game food menu today, I am settled in my chair... Well, hope this gets better fast, cause i need to get back to the machine!!!! Gotta get started... 5 more pieces after this, no time for down time!!! :-)
 

Monday October 22nd

 
Yaye my back got better while I was at work!  I was ready to sew tonight woo hoo!.. So I started my jumpsuit...
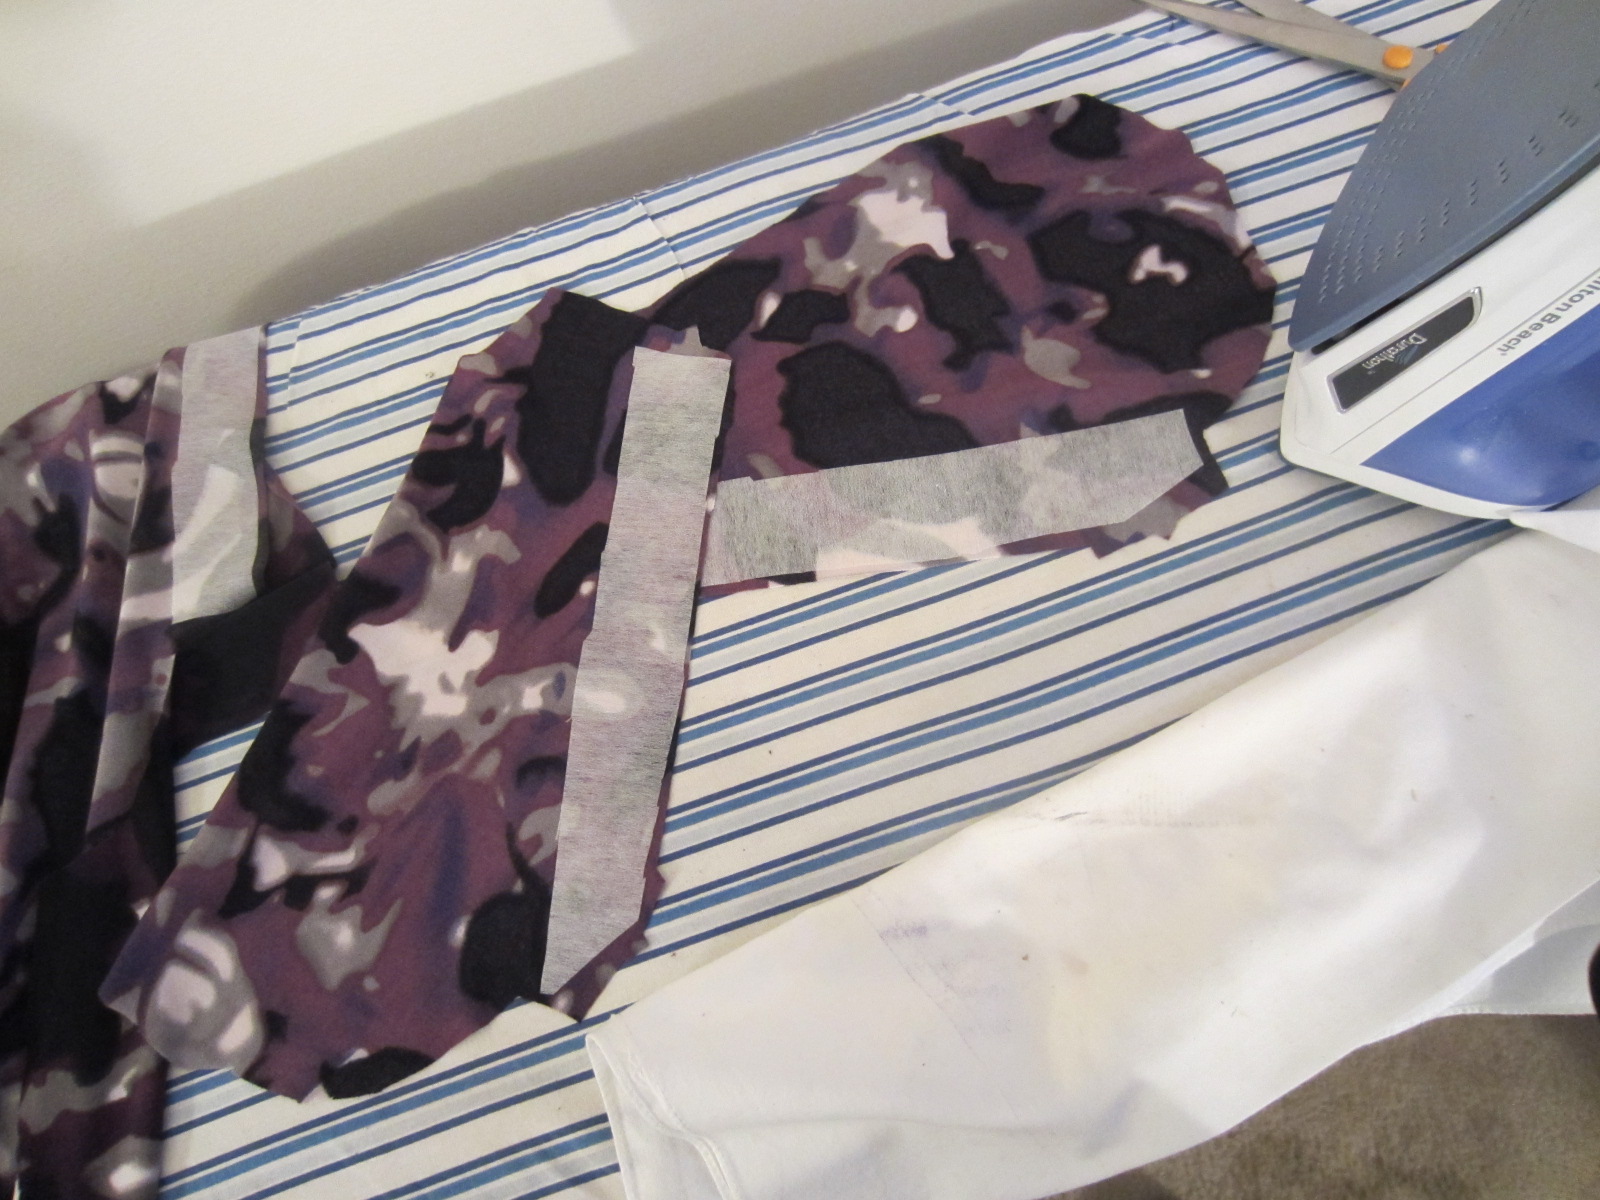
 
First, had to apply all of the interfacing.
 
Here's a picture after the back pleat was sewn in and the yoke was installed on the top back
 
 
Well, the top is complete, except for hemming the sleeves, and i tried it on... perfect size, so I was right to go with the size small... That's a relief!  The fabric felt so nice, too! I was worried that the hand was going to be too "slinky" for this jumpsuit, but I now think it will be just how I imagined it when I first picked it out a year ago!  and the poly fibers made it feel warm, too, so it will work for this time of year.  I was on my forum at Stitcher's Guild and read a thread on knits and they talked of poly knits, and how back in the day they were "plasticky" well this one is far from that for sure! It is very soft and felt great on my skin.  They joked about how it "hurt to hug grandma" (scratchy)  LOL  I, too, remember that growing up and even remember wearing some of those poly's!  Yuk!!!

Here's a picture of the back.
 
Here is a close up of the yoke and shoulder. They both have top stitching.
 
Did I tell you that the Turtle neck pattern came today! kewl, huh? I'm psyched!  I am waiting on some swatches from Fabric.com in order to choose my 4th fabric for my 4th turtleneck.  I am going to make the jumper dress 2nd anyway and the turtlenecks last.  I am very pleased with how the jumpsuit is coming along...I may not be sewing at the super high levels of my new friends at the forum, but I need to start somewhere and perfect my newbie skills before moving up to intricate pieces like this woman Ann.  Check out her red vest and Blue top -they are TDF. 

 She has details on it on her blog Here:Ann's Blog .
 
Well that's it for tonight...going to start on the next steps tomorrow after work.. Will update after that.
Cheers!
 

October 24th

 
Well, I finished my Jumpsuit! How about that! It was one year in my stash, now done! DH gave it his stamp of approval... After assembling the bodice, the first day, I assembled the bottoms on Tuesday.  I might tell you I totally worked right through dinner, lost in my sewing cave, and DH had to whip something up and remind me to take a break and eat!!   Here I installed pockets, too.

And an good handful of buttonholes....

As I said this fabric, notions, pattern were from a year old stash, and I can see  I had a different view back then on which buttons were the best choice for this, but that's minor and I can change that any time!  They are nice buttons, but if I was doing this all now, I don't think I would have settled for these...

The pattern called for waist casing and buttonholes for the openings for the ribbon to come through on each side.

This is very comfortable to wear~ If I drive tomorrow to the office (as opposed to riding my motorcycle) I would like to wear this!


This was real fun to make! It is my first piece of my 6PAC, and I will be starting on my Black Cord Jumper this weekend, or next week.  Probably at least cut the fabric on Saturday...
 
All told, this took: 2 1/2 hours to cut the pattern and the fabric pieces, (with a quick lunch break in between), then 3 1/2 hours to complete the bodice (while cooking rotisserie chicken and rice), then 4 1/2 hours to complete the bottoms, and assemble them to the bodice - Heavy concentration on this segment..., and the final 1 1/2 - 2 hours making the button holes, installing the waist ribbon, and attaching the buttons. so about 12 leisurely hours & Wah-lah!
 
I will make this pattern again in a different fabric, because I love the pattern and results~.  I will make an adjustment possibly for the neck/collar, but if the material has more weight, I might just leave the pattern as is.  Now that I'm done with this one, I'm thinking that the jumper might be the hardest of the group... :-)
 
Check out my next post on the Jumper when I start it!


10.20.2012

Ravens Letterman Sweater

Another order from Hubby... Done!


A few weeks ago, hubby told me he was ordering a letter "R" from somewhere on line - an 8 inch letter in collegiate style so he could make a Letterman's Sweater.  The "R" was to signify the "Baltimore Ravens" and the company making it was going to custom embroider the word "Ravens" in the letter they made. He said he had the order set and was basically going through the check out process, and by the time they added the shipping, it was almost $50.00!, so you know he exited that shopping cart straight away.  So when he told me about it, I just knew I could make one... So, I made a prototype for his review, and upon seeing that one, he came up with the idea that he would like the "R" to be made out of the License Material - he got the idea partly because I whipped up a quilted coaster for him to put under his glass on his end table out of that material, a few weeks ago. :-)...

Any hoo... so he placed  that order with me 2 weeks ago, and now that I signed up for the 6PAC on the Stitcher's Guild Sewing Forum Here is the thread, I figured I needed to get the pending orders out the door..  LOL...

 First he had a large patch to sew onto the back of the sweater.  Took care of that right away...  Here is the sweater at the beginning..  It is a men's cardi, so it is too big for my 'fit-to-me' dress form as you see in the pictures...

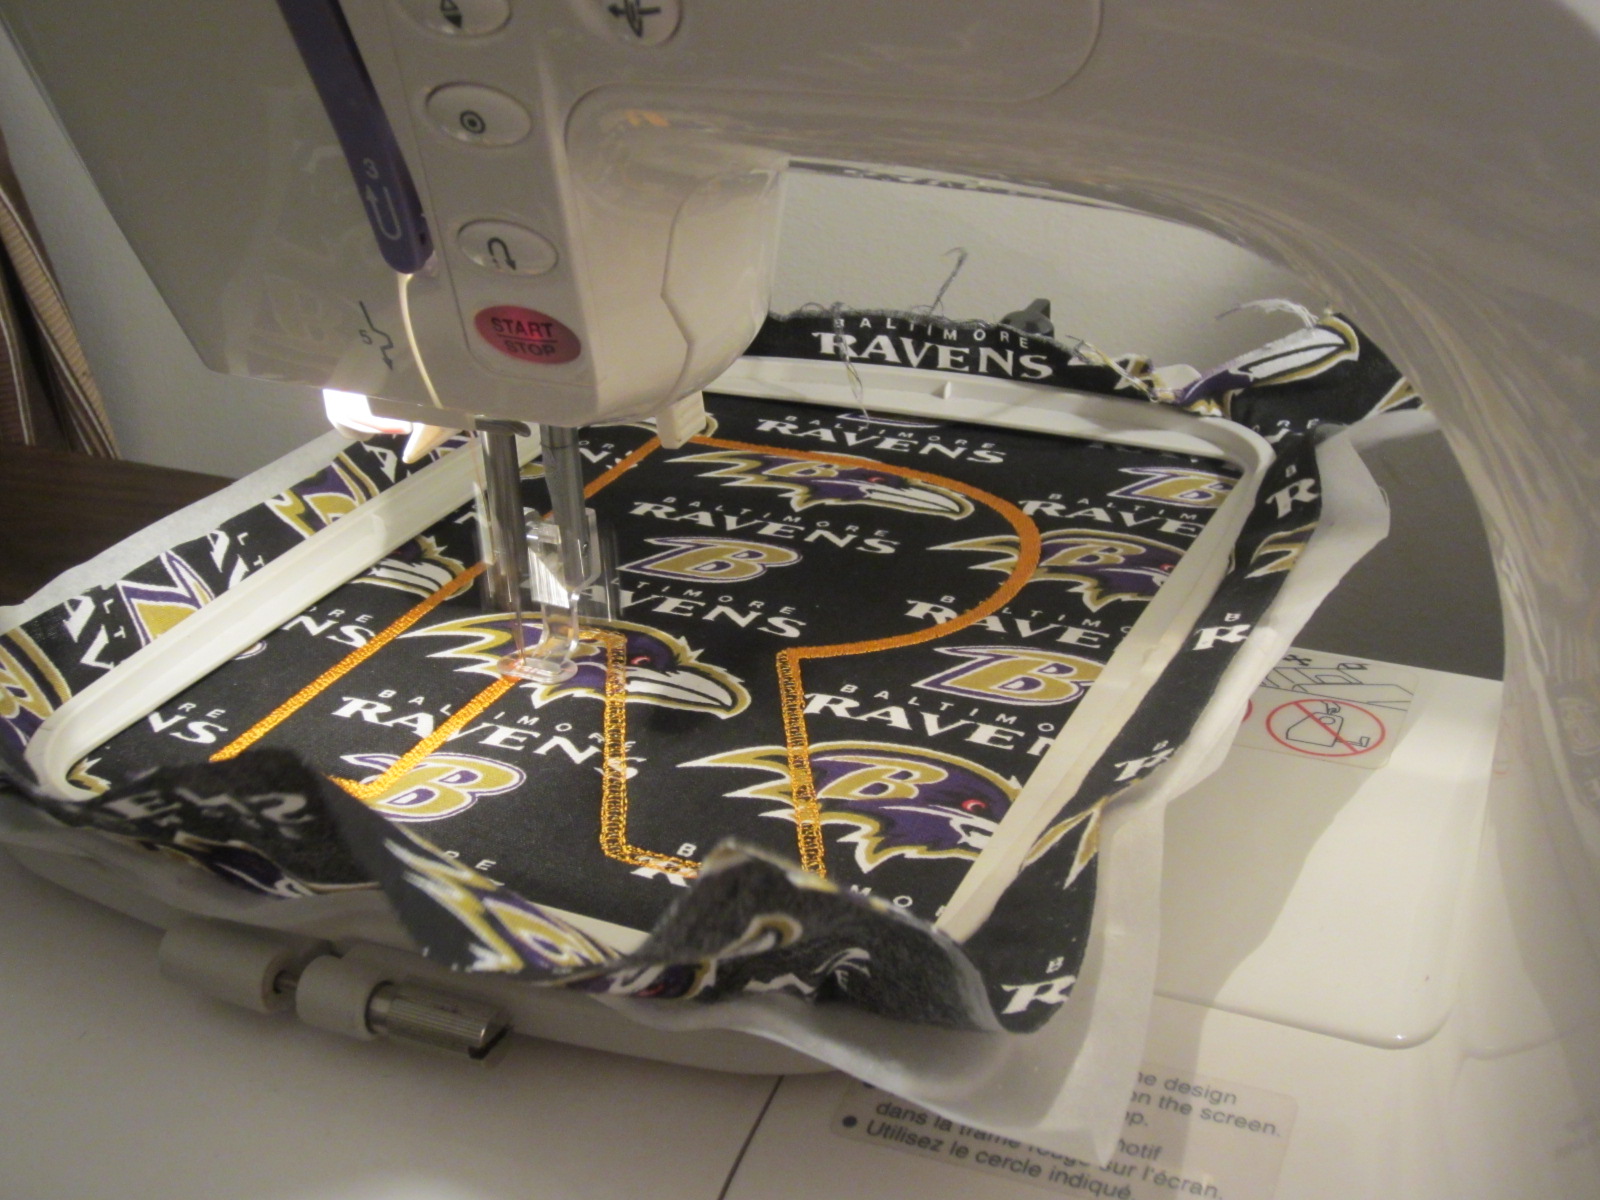
Then I had to mount the material so the "R" would sew out where the "Ravens" wording would fall readable in the middle of the "R" and the Head would be visible on the top.  This would tell the viewer the purpose of the "R". Then proceed to sew out the "R" via embroidery.


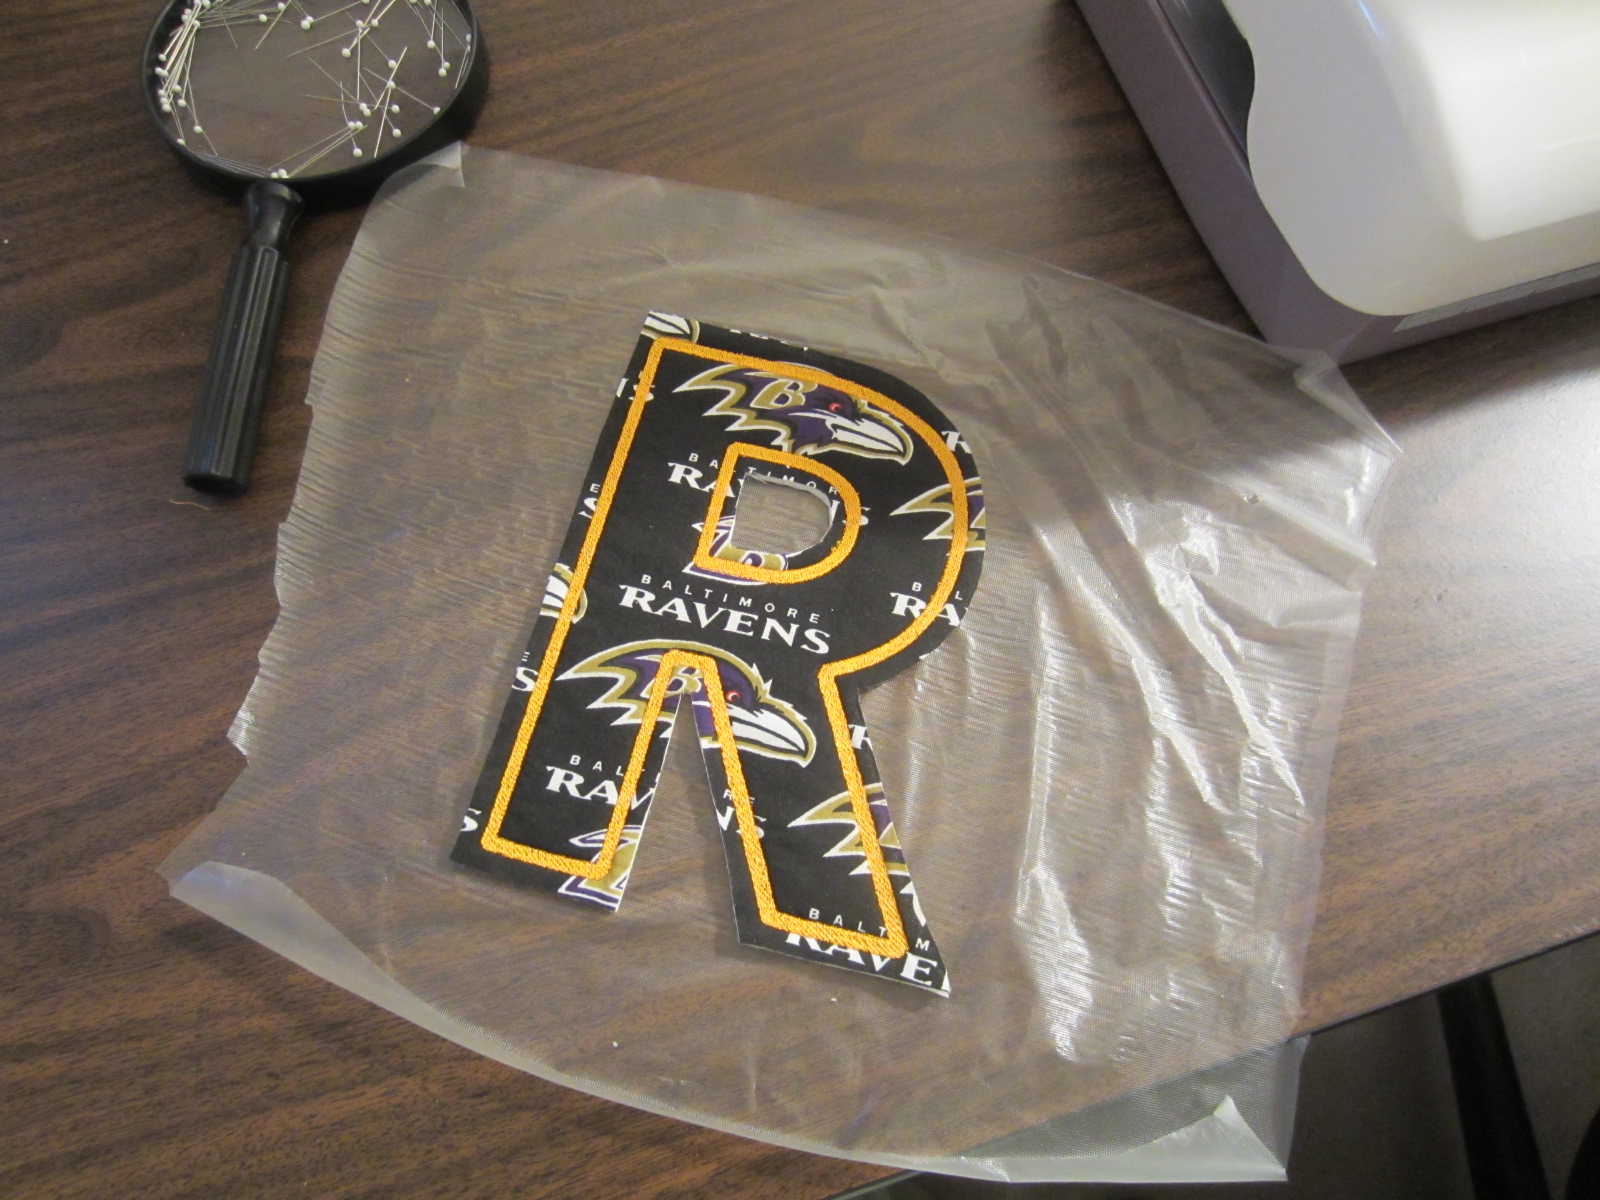
Next I cut it out to prepare for finishing the edges with a machine edging of tight zigzag stitches.  Since I was going to straight stitch the letter to the garment, I mounted the letter on clear stabilizer so I had something to hold on to as i maneuvered the letter around as it sewed.  I dont' really know if i needed to do that, maybe someone could tell me - actually I will probably try it without it on a piece of scrap so I know...


The more I am sitting here thinking about it the more I think I probably didn't need the stabilizer.. Learn as you go....

  Wah-Lah!


Here is the final product.. I think he will like this - he went for a ride..so I'll see when he comes back, but I'm confident!  See how I just saved him $50.00! and this one is custom to boot!  This'll be worth a trade for cleaning the kitchen one night after dinner! (Ahh - he does that a lot anyway - He's a BIG help!!!) Hoo Rah!!!

10.19.2012

Forum Goodness Sake :-)

I joined Artisan's Square Sewing Forum....


So... Hubby thought I might enjoy a sewing circle or something like that, so I looked around for a forum, and came across Stitcher's Guild Sewing Forum at Artisan Square.  I'm excited about the threads there, and am still exploring around the forum...  Anyway they have (I dont' know if others do, too but...) a thing called SWAP  Start With A Plan.. sewing contest.  So I was reading up on that thread, and it appears that they pick a theme to sew by like color blocking pieces, or, well, i forget the others at the moment, but themes anyway, and they have a time frame to sew 12 pieces of clothing to the theme.  The thread this time was leaning towards "keeping it simple" patterns for this years' event.  So I thought it would be fun, but 12 pieces! anyway I read on to the forum and found a 6PAC thread that just started.  Turns out a 6PAC started one Autumn, and was named 6 Pieces Autumn Collection. and they challenged to sew 6 pieces in 2 months.  It caught on and now they do one 6PAC for each season.  I'm joining the winter one, and have already named my challenge list of 6 pieces:

4 - Turtlenecks - Because I am in DESPERATE need and I'm unable to find any I like, plus the two I own the sleeves are not long the way I would like them to be, and I only have light pink and black.  I was going to sew cuffs onto them anyway, to make them longer and more enjoyable to wear, but that doesn't mean I don't need more in my collection...  I am sewing
     1-Burgundy in Ponte Roma knit - got fabric today
     1-Off-white in Ponte Roma knit - got fabric today
     1-Fashion reds/purples/knit - got fabric today
     1-Purple fashion knit - still have to find
The pattern is on it's way - got it on Etsy.

1 - Jumper/Dress - In Black corduroy - the receipt called it Caviar corduroy.  It is a wide striping cord.  I am making this out of two patterns joined together - my favorite short flare skirt, and the top of my overalls, so combined they will be a jumper.  I have both TNT (Tried and True) patterns.  Got the fabric today:

1 - Pantsuit in a purple poly knit. This fabric and pattern I've had from when I first started sewing, but never took on.  This challenge will give me the boost to get it going and finished.

If I need an alternate (if I end up with a train wreck) I will make the Red corduroy overalls that have been sitting in my stash for a year also. (from my TNT pattern)

Well I posted my list this afternoon on the forum, and so begins my adventure.  I have until Jan 31st to complete my mission.  In between work and Sunday football (which includes game food prep and such) I think I can make good headway.  Plus I'm going to take some time off from work next month and December, too!

Here is the Black Cord Fabric:
 
 
Here are the other 3 fabrics:

 
I'll post ongoing results... stay tuned!


10.15.2012

Overall, It's sew Kewl

Purple Overalls!


Here is a pair of overalls I made early on in my adventures...it was where I learned how to install a top pocket (front and two rear) and double top stitch.  I also learned about pattern sizing.  I used a size medium pattern, and these were too big.  I wore them once, because I just had to wear what I made, and then put them away.  Now that I've got some more stitches under my belt, I'm going to alter them to fit me.  I made a temporary adjustment just so I could wear them now.  Used a real beautiful deep purple crushed velvet corduroy material for this, the beauty of the color doesn't come through in the photos...


The thing I think I liked most about making these is that I was able to make the length of the pant legs fit me the way I like.  Whenever I've purchased overalls the legs are always too short.  These were fun to make and are made from Kwik Sew Pattern #K3897 Found Here.  I have, in my stash, Red Corduroy material to make another pair of these.  I bought it way back when, and would like to get around to making them!  It's October - Fall weather and they would be great for going into winter.  I do remember they took about a week. That was probably due to learning curve, too, but a lot of the time is on the detailed double top-stitching.  It'll be nice to get the new pair done.  Sew many projects - sew little time! and then when I get a chunk of time, sometimes I get worn out! The chores go out the door - no food shopping, straightening the house, cooking... I'll sew like a mad woman all weekend! Now it's tough because it's football season, and Sundays are taken, but I get stuff done a little at a time.... More later gotta get the Chicken out of the oven!
Cheers!

10.14.2012

Weekend Break - 3 Projects

Well, I'm stuck on what to do for my 2nd Ravens Jacket, and what to do on the rest of my 1st one...  So let me post two other projects I completed - My new shower curtain and my neck pillow!

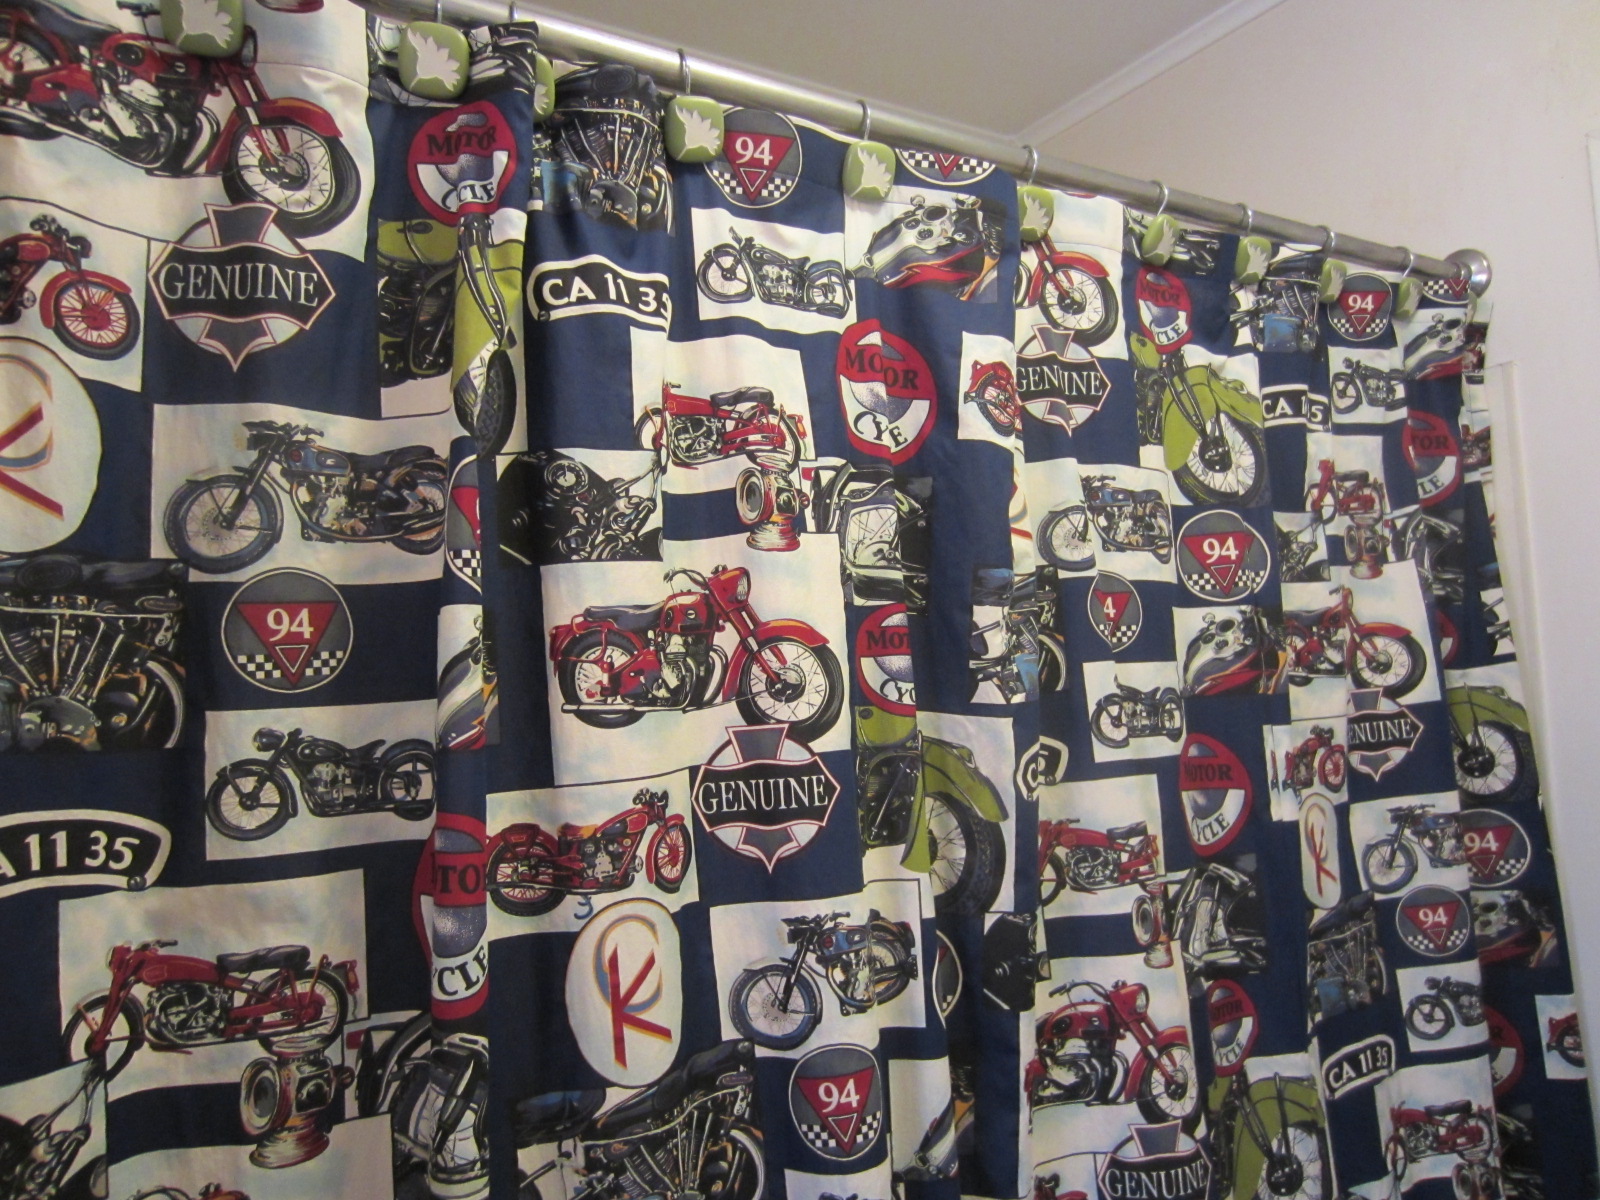
I had been at JoAnn's - yes, my home away from home - since it is the closest fabric store to where I live, and is very convenient to get to.  There is also a store called G Street Fabrics about 40 minutes away, but they have lost a step from what they were back in the day, where they were like a huge warehouse with wall to wall, floor to ceiling fabrics of every hand, size, pattern you chould think of.  Now they are half the size with not such a big selection.  Or at least I was disappointed when I went last time, because I was excited to go to be in a plethora of fabrics and had a hard time even finding what I wanted, and no more of a selection than the fabric store around the corner - and no fabulous sales or anything, either; seems you had to clip a coupon from the website to get any breaks. ANYWAY, I was at JoAnn's and the RedTag materials were 50% off, so I plundered through them, and came across this motorcycle material! it was perfect for anything!  I immediately thought of a shower curtain, and at $4.00 per yard scooped up 4 1/2 yds.

Then I wanted to try my hand at using rivets, truth be told because I didn't know of the button hole method at the time for the shower curtains!  Well, how about it, the notions wall was 50% off, too, so picked up rivets and a rivet hand press (pliers), knowing that the press would certainly be used for future projects - purses, duffel bags, who knows what, but they are such a kewl finishing piece.  The hand press was real easy to use.  You just measure off your fabric width and divide up the top into the 12 holes spaced evenly, with both ends being in one inch from the edge.

I guess you can't really see it in this picture, but I included "bottom weights" - they are from the curtain section of the store, so the curtain hangs appropriately.  I just spaced them into the hem - a set of 4 one inch weights.

So the next day when my husband saw it, he remarked "Oh you got a new shower curtain".  Then I told hiim I made it the night before (he fell asleep early), and he remarked "WoW" and gave it a second look.  I showed him the details - rivets, weights - He really like it and was impressed - I could tell.  Not to mention enjoying the fabric pattern! The curtain only took about 2, maybe 3 at most, hours to make - It is an easy project, and I was thrilled at the results!  This is a completely washable curtain, too.  Gotta love those clearance sales!
 
Next - here is my neck pillow!  I use this a lot now, it is a comfy pillow to use while sitting in my chair watching a movie, or TV.  Talk about simple - this was real easy to make.

I tried it because it was my first attempt at using piping.  I tell you, the piping itself is not difficult, but doing it for the first time on these curves was tricky.  but it worked out well.  I need to read up again on how to "end" the piping - join the ends together so there's not that overlap, or white under-cord showing through at the end of the project.

The material I chose was a nice soft sueded material,  here is a close up of the piping.  It really gives it a nice look.  I like piping, and found out how to make my own, in case I want larger piping or piping to match an item...but for now, the store package is good. :-D

This was a real easy project and now that I'm done with it, I can't help but wish I embroidered something on it... :-)  But at the time - don't you ever just ever want to accomplish something easy and quick? no muss no fuss?  I wanted to do something that would yield a nice result, but have no hassle, so this was my pillow.... :-)  Quick and easy - under 1 hour.  If I was to embroider, it would have taken all the time to figure out what to embroider, measure up the pattern to the embroidered design, so it's cut properly, centered, all that jazz... (not to mention the time to embroider)...You know what it's like....anyway I do have material left over for a second pillow.....
 
Lastly is my IPAD Pouch that I made for a colleague at the office. They have Vizsla's (Dog breed) and one day I was surfing through the Embroidery Library Catalogue and just came across this Vizsla design. (found here)  It is not common to find, so when I saw it, I had to do something with it.  Decided the IPAD pouch was appropriate, and even if they didn't use it, they would have something with their dogs on it.  I personalized it with the dog's names.  The design, I downloaded into my embroidery software and copied and flipped it so I had two facing each other.  I decided to go "Low Key" which was to stitch Black on Black, that way the design would be there, but not stick out like a sore thumb.  I used black faux leather, because that would be appropriate for business.   (Case Pattern is by Gaila Designs.)

Used fleece batting, and put in a zipper, and silky lining.  The zipper opening gets smaller than the rest of the bag, maybe there is a way to minimize that, I have to practice more on my zippers for pouches, purses.  I made the Koala clutch after this pouch, so I did learn something here....  Anyway, I presented my project to my colleague (upper management) and I think they genuinely appreciated it.
 
That's it for now... I will go ahead and start my Ravens Jacket #2 page, all I have is the jacket at this point, I will eat breakfast and see if I can get any creative ideas...
Ciao!


10.07.2012

My Ravens Jacket # 1

Can't find the right design and size for the right price?  MAKE ONE!

I have been wanting a new Baltimore Ravens Jacket ever since I sold my previous one because it was like 12 sizes too big (I lost 50 lbs last year).  I guess I have bad timing because all of the jackets in my size that were to my taste are sold out - and they were like $175.00 anyway~!...  So I decided I would make one for myself.  So I started the hunt for a pattern.... That search was difficult as well... See I wasn't exactly sure yet of what I wanted the jacket to look like, which is a common issue for me when I start with a "Blank Canvas" because there are limitless possibilities and I have to really go through many thoughts to narrow down my desires. So, after a few weeks, I decided I wanted  Bomber style jacket, and during my looking for patterns and materials, I had the fortune one evening of finding a blank jacket that I could sew all of my designs onto.  During these weeks, I was widdling down the jacket style, the material of the jacket I wanted, coming up with ideas for layouts, wondering whether I was making the jacket from scratch, or buying  a blank...  ANYWAY, so that evening, I actually found two jackets I liked, so you will see them both here as I make them.  The ripstop nylon jacket came first, so I started working on that one.  Here is where I began, and I will keep posting until I'm done.
This is my drawing plan that I came up with for my jacket. The first Jacket I am making here is a variation of this design.  This design has a background of a simulated football field, a large Ravens head logo patch, a field goal post, and the lettering "Baltimore Ravens"  You'll see how my first jacket mimics this design simlarly.  However, you  will notice that the football field in my first jacket is basically a replica of the Ravens' field. (artistic license not withstanding) :-D.  Let's get started...
 
I started off with a gold lettering "Ravens" to practice the new technique I was trying for the first time. I had always wanted to try it, but wasn't sure if I knew the right way, so I checked with a fellow sewer (Marianne) at the office that said she did a lot of applique, and after asking her, I felt confident to try it!  I was going to "freestyle" an applique and use a material with pile and an outline font as a base, then mount it on a background, to then be sewn onto the final item (my jacket) with the same applique technique.  I added this picture here to show you a picture of my machine, since my blog
doesn't really have one yet.
 
Here is where I started my "Baltimore" lettering.  I decided to do this one in purple, thought the purple might be a better choice after seeing the gold lettering.  Using the same material with pile - this is actually furry felt - a whopping $4.99/yd plus 40% off. only needed about 9 inches for one word and 11 for the second, and it's like 20 inches wide, so you can do two words for a $1.50.  Make sure you iron on the wrong side though so you don't ruin the pile...LOL...

Sewing out took about 1/2 hour or so.  I uploaded the fonts from a font CD I have from Summitsoft and used my digitizing SW to set up the wording to sew out. The SW allows for sizing, set up, and what not.

 
This is the result of the Baltimore word appliqued onto Purple felt background that will be sewn onto the jacket.  I was thrilled at how this turned out and was encouraged to plunge forward...  Mind you I was still really "testing" things out, but thought it came out how I wanted, so I decided to use it in the final design.

Next, I wanted to incorprate a football field design, and had already bought a 1/4 yard of a woolblend felt that looked like grass turf, you know, for testing....  Well I sat for about an hour or 2 and designed the field in the SW program...It took two hoopings to sew out, since it was like 20 inches long.  This is the start...

I had the field done, and showed my husband, and asked him what he thought.  He thougth it would be real neat if I could personalize the field with something in the end zones like what the Raven's have on their field... I totally agreed!  Do you see how my projects take on a life of their own????  Now not only was I going to have a football field, I was going to have a RAVENS football field :-D...

Here is the field with the end zones added.  I added the emblem at the 50 yard line as well! (see below)

Here is a picture of the back of the jacket with just the three custom embroidered pieces I made today.  I have more items and patches that will go onto the jacket before it's done, so I will post those later...
 
So, what do you think so far??  Even though it's not done yet, I'm still going to wear it tomorrow!  afterall, we won our game today.  We're 4-1-0 so far this season.  Today's win was not pretty, but we'll take the "W".  Talk to ya later when I get more on the jacket.