What an Adventure...
So I'm off on the adventure of making my outfit in Faux Leather. I'm making Pants, Native American Shirt, Halter, Cap, and Hair glove. This is my second Motorcycle outfit for my SWAP (Sewing With A Plan) for a challenge (it also happens to be a contest) that they hold every year on my Favorite Forum. I finished the Jacket and pants of my Denim Motorcycle outfit Here... I will make the matching Halter, Cap, Hair glove, once the fabric is back in stock at Fabric.Com They say next week. I hope so, because I also will be making a Skirt and a Goth Top from it on the other side of my capsule: (Ruffle Collection) I am on the 5th iteration of my SWAP plan, but I think I'm settled. Had to make my [hopefully] last adjustment when I found out in the rules that my denim motorcycle jacket would not be considered a top, so I needed it to be my bridging piece, and then it had to tie to my other capsule, hence the matching skirt and then to match the skirt, I am substituting one part of my Goth top with the denim instead of Black crushed velvet. Wah-lah! it came together. I am also designing the Halter on my own, I have an idea that I really like, so we'll see if I can pull it off... I've grown in skills again lately, so I'm willing to try it. I am introducing eyelets to my armory of skills and options, so those will be nice. The halter top will be laced up the front. I love the look and finish. Got a pair of Pliers on a 50% off sale at Jo Ann's I already have the big ones for the shower curtain rivets. So, off on my adventure... here goes...

Here are the trousers... These are a great pattern for me, I love them. Burda's Bella # 6011. Don't know the month/year.
Friday
Ordered and received the fabric about 1 1/2 months ago...

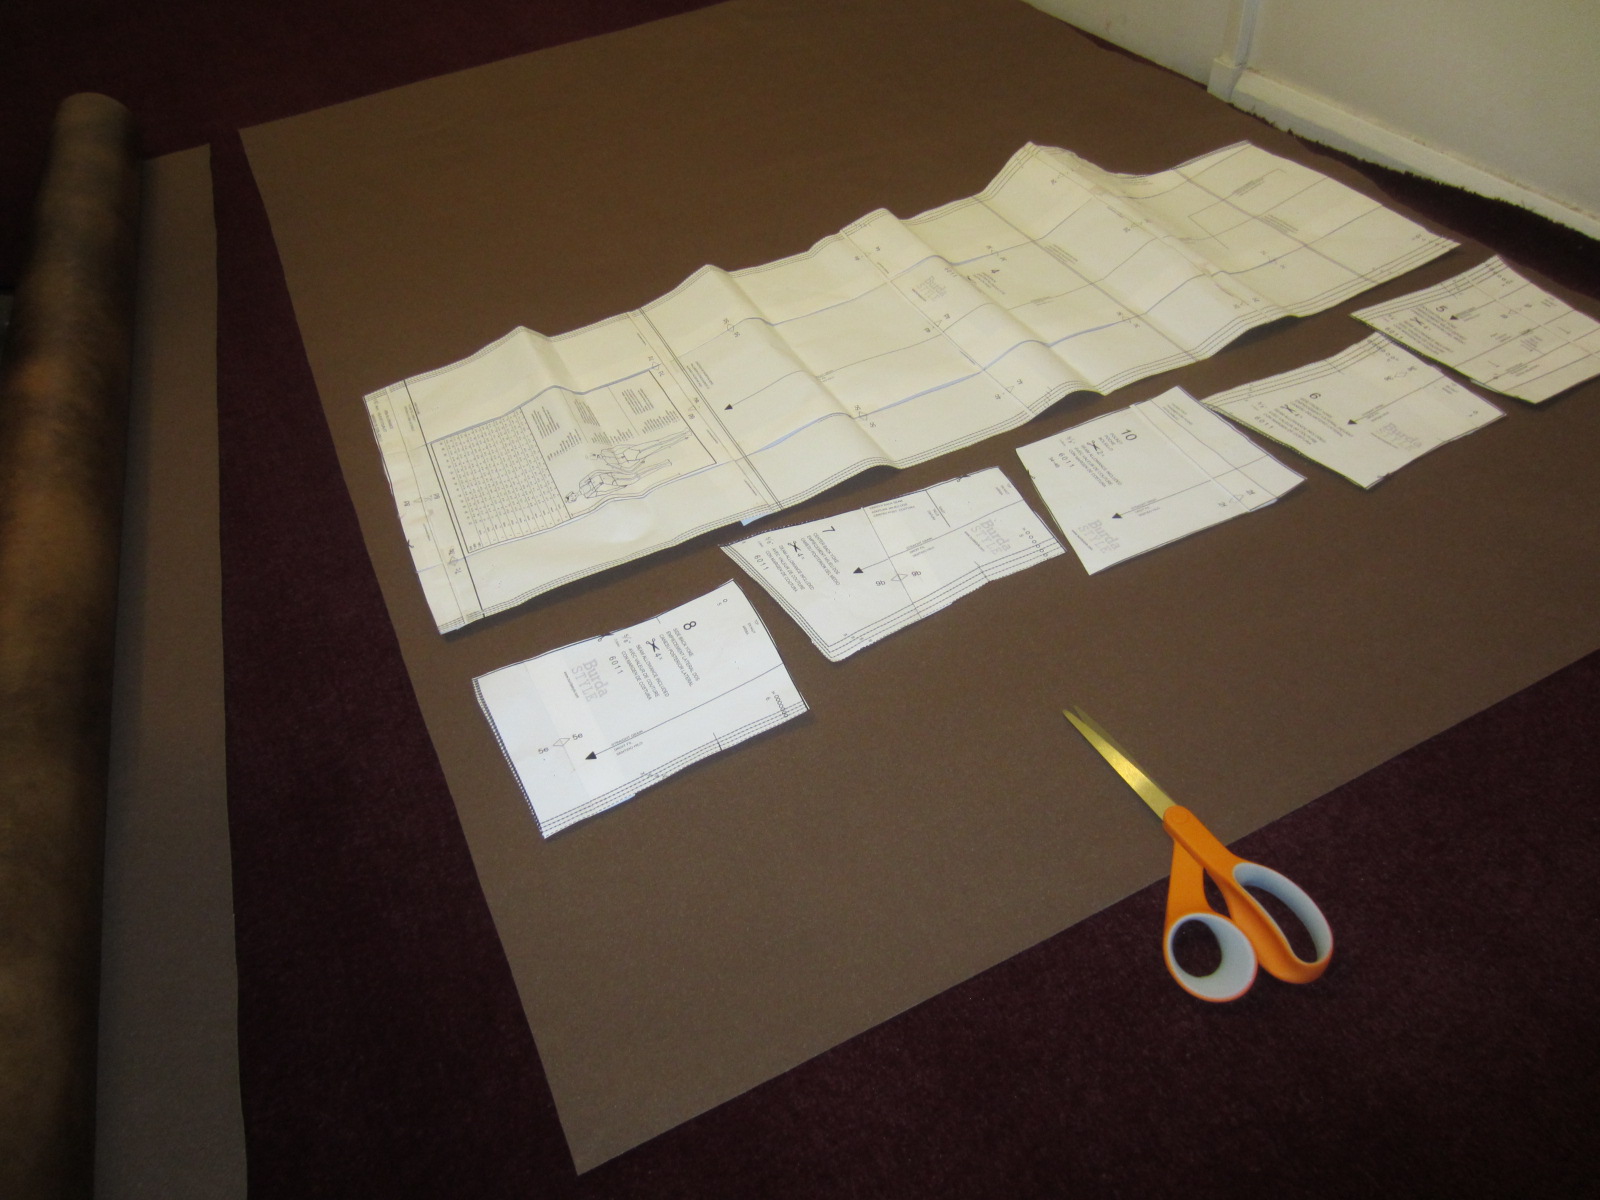
Here is the roll and the pattern pieces. This is the third time making these trousers, so might this be considered a TNT pattern? I love this pattern BTW.

Got 7 yards, I think it was $16/yard - and wouldn't you know it, I was in JA about 3 weeks ago and found some faux leather with my favorite look on the clearance racks - at 50% off no less, came to $3 yard, took what was left on the bolt (4 yards). So when I get home, I unfold it, because I'm going to roll it over this roll to get the creases out and store it until I use it, and it's the SAME PATTERN! Only I could tell the Minimal difference! no one could tell to the naked eye. and $3 yard. So anyway, the fabric is slightly different, so I'm not sure if one is better quality than the other, and will "hold up" better or not, but I have enough to add on my halter and then some, so I'm happy...

Unwrap the roll...

So let's see how to work with fabric on a roll... Guess figure out how much length you need at a time and trim it off so you can fold it right sides together as you normally do a standard procedure.... This looks about right - I can fit all these pieces on a doubled piece this length...
Trimmed... But wait.. that leg pattern looks awful wrinkly... There is no room for mistakes on this - need to make sure I can do the best possible job the first time around...

Ah yes... Iron out that pattern piece - much better... I will be able to cut properly now....

Okay, so doubled over, and held by clips on all sides, Need to lay out the best possible configuration because I will need 4 each of those top 4 pieces... Now - without pins, how do i get the pattern pieces to say put so I can cut? Okay... Tape them... you know make those little tape circles and tack them onto the back of the pieces and press onto the fabric...that's all I came up with - it worked, too.
Like This


Ahhhhhh Hold my breath -the First cut....I am nervous here....not ever working on a project this size with this type of fabric..

Well I would cut a little and then move the clip to a cut side, to keep it together while I cut the next side... it all worked out so nicely....

The first half was cut.. the second half was the other pant leg, and a few pieces of the pocket. I did it all the same way...

This is how pretty this Fabric is - I love the "stonewashed" look to it... or maybe it's a "weathered" look.

Now to cut the interfacing. I wasn't totally convinced I needed it since the fabric was pretty stable, and I think interfacing is a stabilizer, but still not knowing all these things, I wanted to err on the side of caution and add it.

Applying.....It went on well... tried not to use steam because I read on my forum one of the contributors mentioned something about drying out leather, so again trying to err on the side of caution. I really want these to come out spectacular!

Just a snapshot of the pattern hanging on the wall with the directions posted. I had a nail on the wall so I punched a hole in the directions, so I could hang them and turn pages easily as I worked.

Okay - another Deep Breath - I was going to start the sewing! first step the pocket facing I was wondering how the turning was going to go on this, but first things first.. let's get the stitches in...

Using the clips instead of pins, you definitely need minimum 1/2" seam allowance, preferably 5/8 if possible. I have 5/8" on this pattern so I'm fortunate.

You just need to slow a bit going past a clip and just give a light help so the needle screw doesn't get jammed up in the clip... Actually I don't even know if I'm using the right kind of clip for that matter! Maybe there is a certain clip I should be using? I kind of make stuff work as I go along.. I hear you need clips, so I use what I'm familiar with... That's funny...

Okay so now i need top stitching - no Teflon foot, so I hear use tissue paper, I have some of that - let's give that try... Yes it works great! I sewed from the back, so if there were little bits of tissue that i didnt' get out, it would not kill my creation.

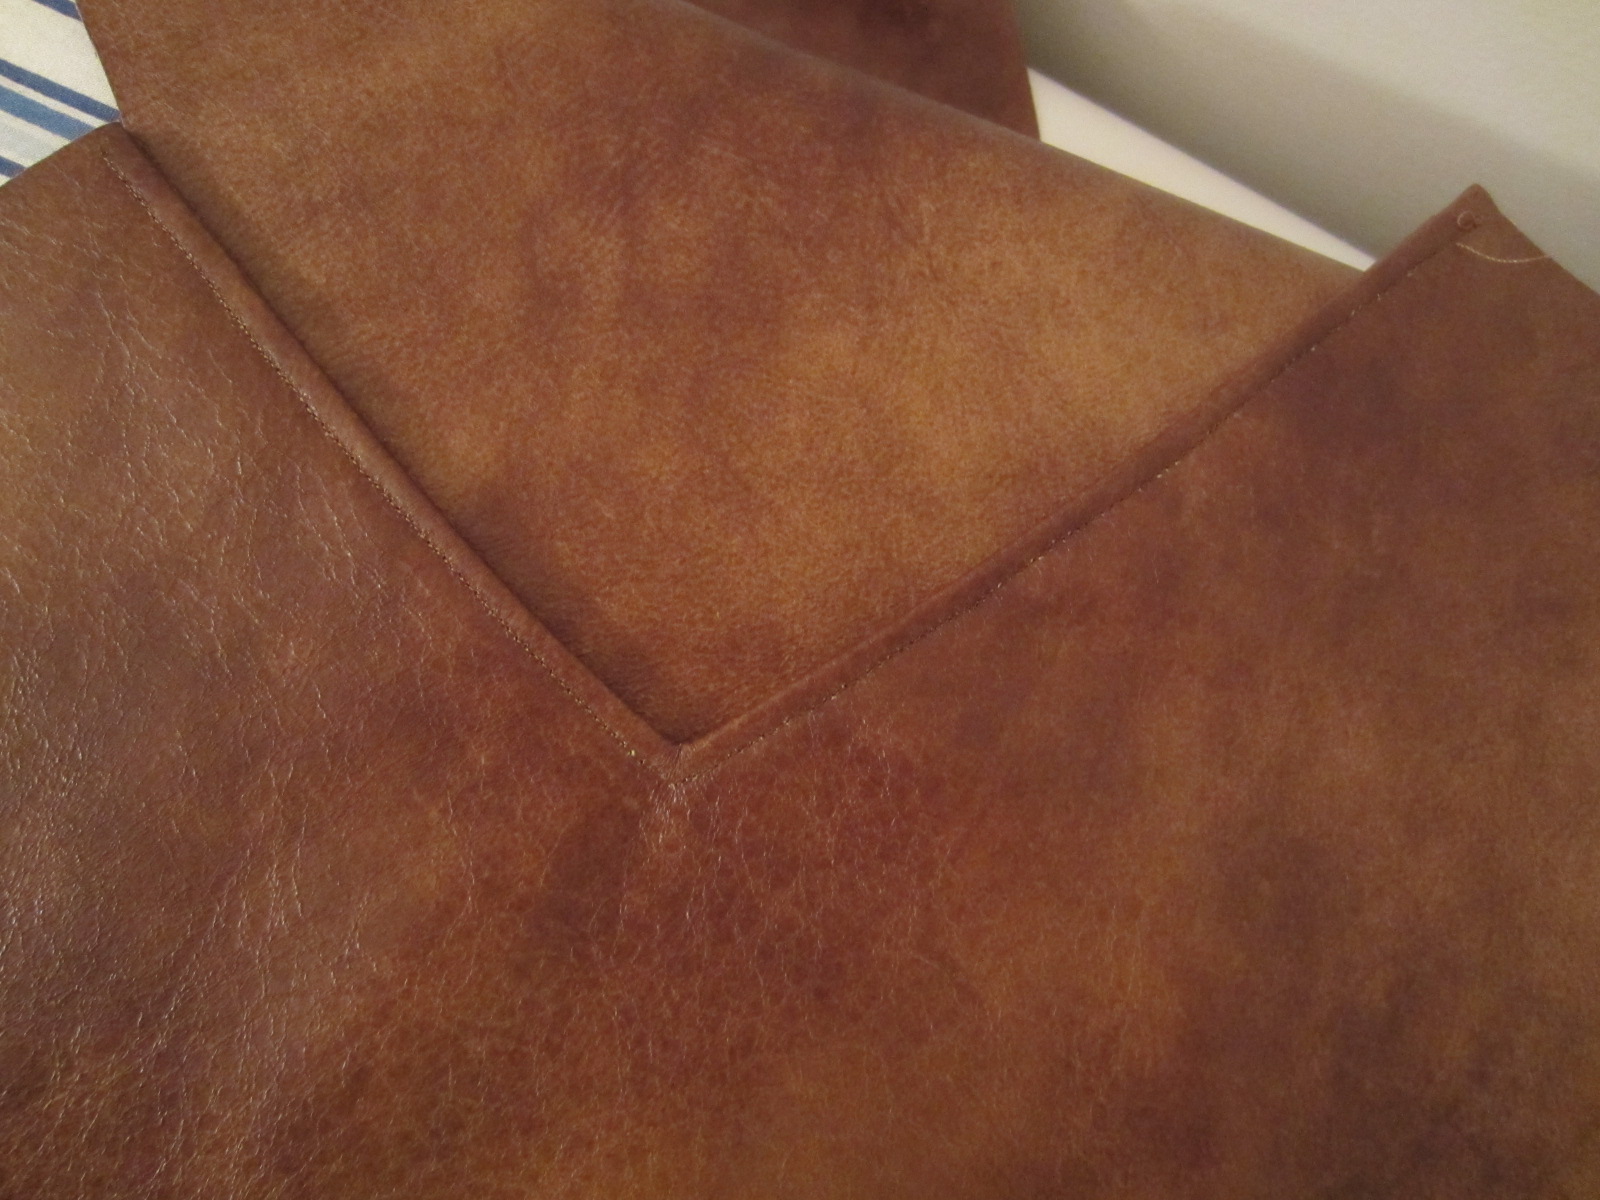
So the turned corner actually came out pretty decent! I am pleased with the result. It was the press of the turning and then the final iron after the top stitching that made it work... The fabric is thick after all, so all things considered, I was tickled pink.

Finished up the other side. Glad I did the tissue paper from the back because there were tiny pieces and I wasn't sure I could get them all out - there's got to be a trick to it, will ask the forum folks. Maybe water or something... we'll see...
So, That was last night.. and before bed I was thinking about the possibility of adding fringe to the side legs of the pants...Give them a kick of motorcycle flair and Native American/Western flair. I think it would be a nice touch, but a little daring. but hey that's me, after all... I could tie it to the halter and give the halter a front yoke that has fringe on it, too.... Could really dress up the outfit... Will ponder this some more... Have to go to JA today before I continue the majority of sewing anyway because I need the right kind of lining material for the pants. I'll know it when I see it. Mind you I have no idea how to put the lining in the pants.... but I will figure that out as well... :-) I have my sewing angel to help me.... :D
Saturday Morning
Well, It's been a busy Saturday Morning. Let me catch you up as I take a break and relax for a few minutes...
Started off the morning by making the pleated pocket pieces:

Had to mark off the fabric

Sewn up...

Attached to the front pant legs...
Next is to add the back pockets to the back pant legs. I had no idea how the turning was going to turn out on the pockets or how I was possibly going to attached them to the leg, since I couldn't iron creases into them the way I did the fabric.

That's when my angel reminded me about the Glue Tactic. So I sewed the top over and then glued the edges over for stitching to the pant legs.

I Clipped it to dry...

Top stitched the pocket top...

Once dry, I removed the clips, tacked the pockets to the pants legs and them sewed them to the legs.

I also learned here (by trying) that when using the tissue paper, I didn't need to use it under the complete foot area, just needed it to the one side of the needle, so there was no need any longer for the picking out of tissue paper from the stitches... Yaye me - see what I mean about my Angel?

Pockets set... next..............
While working away, I kept considering the fringe idea, and then ran it by DH. He commented that if I liked it it would be a fine idea. No opposition... I then made my final decision - YES Fringe! So i set out to plan how I was going to do this.. I knew I would have to add it to the outer leg seam. Needed to figure out how long the fringes should be as well as how long the fringe strip should be (where it should start and stop)...

Start at the hip where the waist seam will meet the hip. Run it down and it needs to stop a bit before the hem line... So let's say where the ruler is...

Comes out to a 31 inch strip.

Fringe width looks like 5 1/2 inches would be a good length, so we can cut the piece 6" W and cut into it 5.5 Inches. It will get caught up in seam allowance anyway, so we'll be okay.

I decided that it didn't matter that I had to be on grain or cross-grain, so I went cross grain to use the least fabric yardage...

Okay - Let's get ready and see how long it takes to cut the fringe...


Weird, huh? these two strips are the exact same length, but the top one does look mighty short, right? :D.. One of these strips has 103 fringes and the other has 106 - that's a lot of cuts!


Nest step was to sew the legs front and backs together, so I had to figure out how to install the fringe. I knew i wanted the "front" of the fringe to show from the front, so I figured out that the right sides of the fringe and the front pant leg had to face. I then lined up the fringe along the seam allowance and wanted to make sure that the fringe would not mistakenly get caught up in the sewing, so I taped the edges down to avoid that. the type of fabric I was able to use regular scotch tape with no harm to the fabric, i had to make sure since this would be taping to the right sides. Sewed up both legs, and glued seams open...


Guess where I had to go now?? My favorite place for shopping...

Had to get the appropriate lining material. (still unsure how I was going to put this in, but onward we go....)

Didn't have to go down the whole leg, only to a little below the knee. Then had to kind of sew it backwards, because with this pant lining, i wanted the finished seams to show inside the pant leg, so the unfinished seams would be hidden in the pants. So that means it will look a little backwards-ish inside out-ish. a mind bender for me, but I got it...

So i sewed the pant legs together and turned right side out to take a look at how things came out so far... Wooo Hooo Victoriously! I'm thrilled! These are the pants minus the waist piece...
Kewl, Huh? Got the waist, the insertion of lining, the zipper, and the hem. I think that is it for these pants Can't wait!!!!!!!!!!
Saturday Evening

Got the waist assembled...

and finished off...

figured out my own way to do the liner :D

Installed the zipper... Then tried them on, and.... not so much.... Well had to go through adjustment time, got burned out, slept on it, and picked it up this morning...
Sunday Morning...
Had to install a Crotch panel for lack of a glamorous term,

That was very tricky to install because the pants were all sewn up. It basically had to be installed below the zipper to the under adjoining seam.

Then talk about shoving a bunch of fabric under the machine! Now I think I know how a quilter must feel???... I had to glue that first then stitch it.
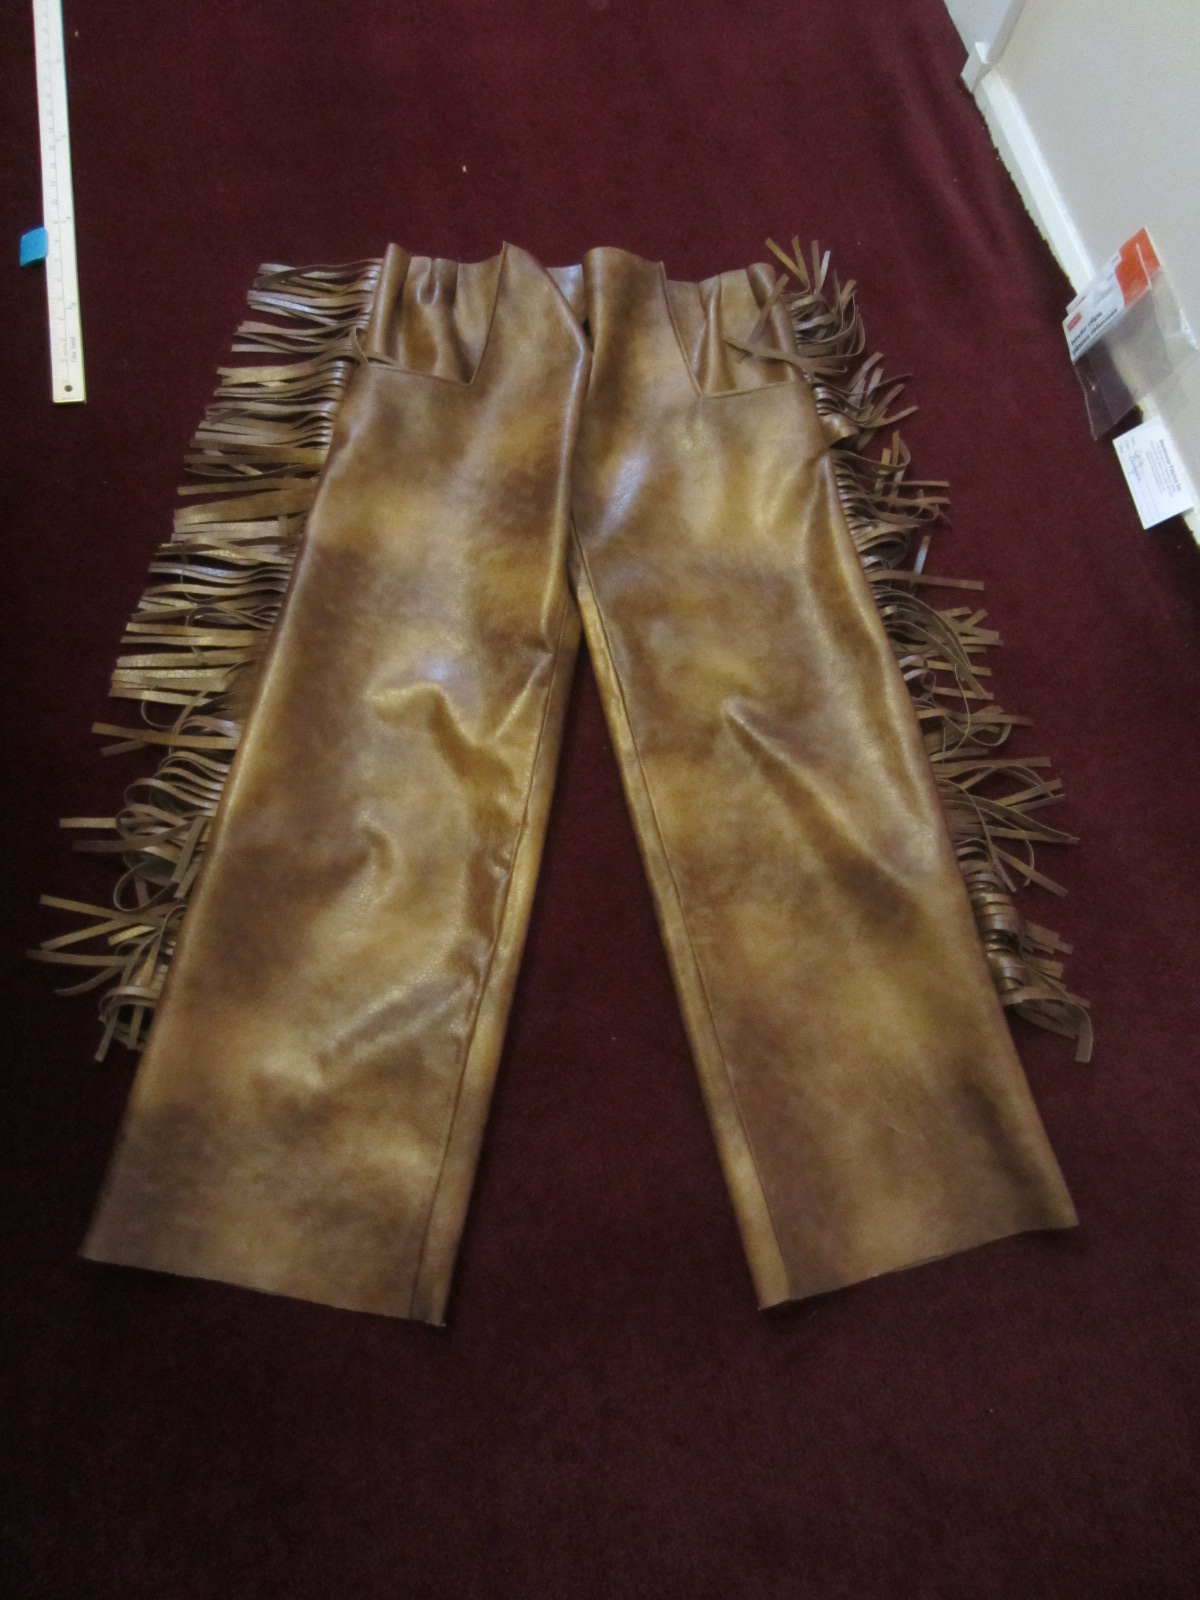
Installed the snap then DONE! They fit! passed the sitting test and everything!!!! Here are the done pix.. I am so happy I added the fringe, really make them work....


I will rest the remainder of the weekend and pick up on my matching halter during the week. Drew out a pattern for it, so will build on that.
Sample of Hair glove:

Sample of Hair glove:
It wraps around a ponytail to keep it neat and help keep it tangle free in the wind! Now I can custom make the right length for my lo-o-o-o-o-ong hair :D
Cheers!