10.28.2012

Altering Leather Challenge...

Not only alter jeans... Leather Jeans!

So....Hubby has some riding gear and needed a specific pair of brown leather pants to go with them, and was waiting to find his size, to no avail.  This model he found in one size up, but passed on them still holding out hope for his size... only to realize that these discontinued leather jeans are becoming even harder to find... so... when he saw a pair 2 sizes up, he grabbed them up with the thought that he could have them professionally altered by a woman who had done another pair of leather jeans for him before. She did a real nice job.  However, she is far away and the alteration on this pair might run a pretty penny.  I looked them over, and can envision a plan of altering them so that they would still look professionally made.  There are a few things my gals at the forum taught me to keep in mind with leather.  Needles make permanent holes, and holes weaken the leather, so no back stitching, and no pinning the leather together...use quilters clips, and I will need to get a Teflon foot, so the leather moves along and doesn't get hung up on my regular foot.  There are leather needles, I already have a pack of those, and they say use poly thread instead of cotton because something in the leather (i forget at the moment) interacts and can affect the cotton.

So I am up for the challenge. Not sure when I will actually get the final courage to start taking these apart to start the alteration, I have to have the right mind set.. you know.. the "I can do this" while I have my definite plan of action.  They say don't take any more loose than you have to.  So I'm not really worried about the sides/seat, but that waist band... I only plan to take that in, not make it a different size band from top to bottom, just the waist size.  So taking that off and putting that back when done, might be a weakening move, but maybe there's reinforcing I can do for that.  Depends how thick that band is, or maybe if I leave the band on, and I just cut it where I'm removing the parts of the sides and the seat seams, and then just join them back together in those three spots when done.  That would preserve the integrity of the waistband to the jeans.  Throw a zigzag stitch on each one - or is that too many holes? It doesn't have to be tight like a satin stitch! :-)

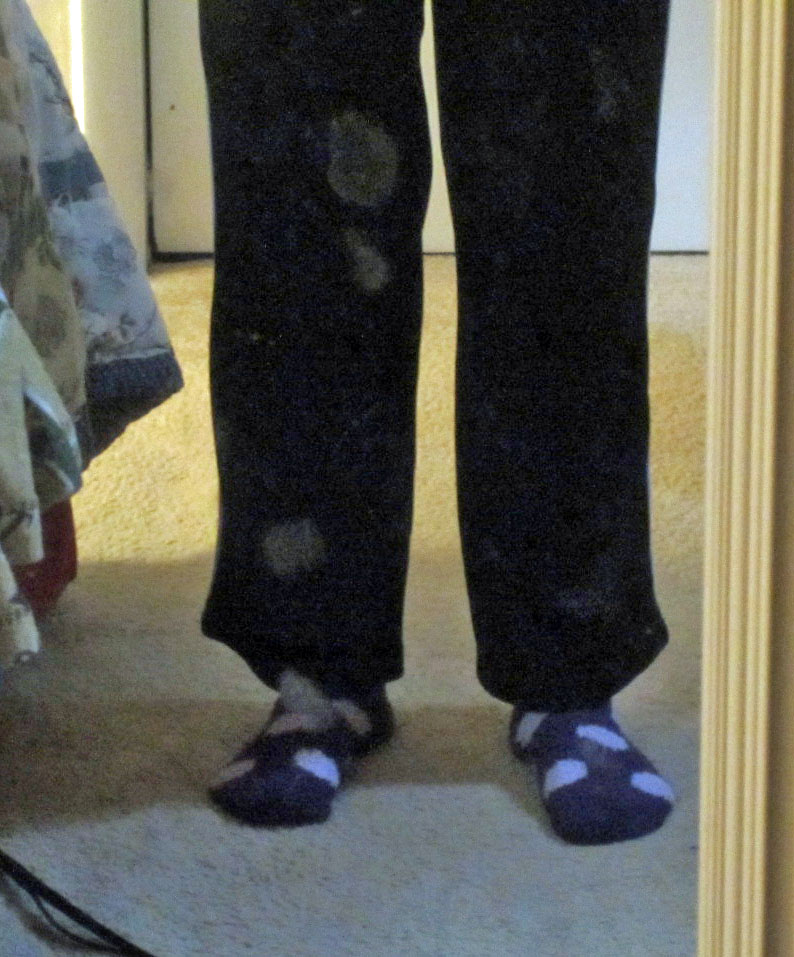
So here's a couple "before" pictures of the undertaking...


The denim jeans are an appropriate size.... This will be a nice project.
 
Will keep you posted...


November 10th

And So it Begins...

 
Well I took on the project today.  I finally had my plan and my confidence was up.  So I set out by doing some measuring and figuring.  I figured I would go down the outside of the leg by 19 inches total, and taper from 13 inches to the 19 inches, so a nice 6 inch taper should work in nicely and not pucker too much...  My plan was to take the seams loose and reassemble them, at the smaller measurement (taken in by 1 inch from the previous seam line (which would net a 2 inch take in)  while cutting out the corresponding portion of the waist band and reassembling that with a zigzag stitch.  This would be taking the littlest amount loose as possible and making the adjustment.
 
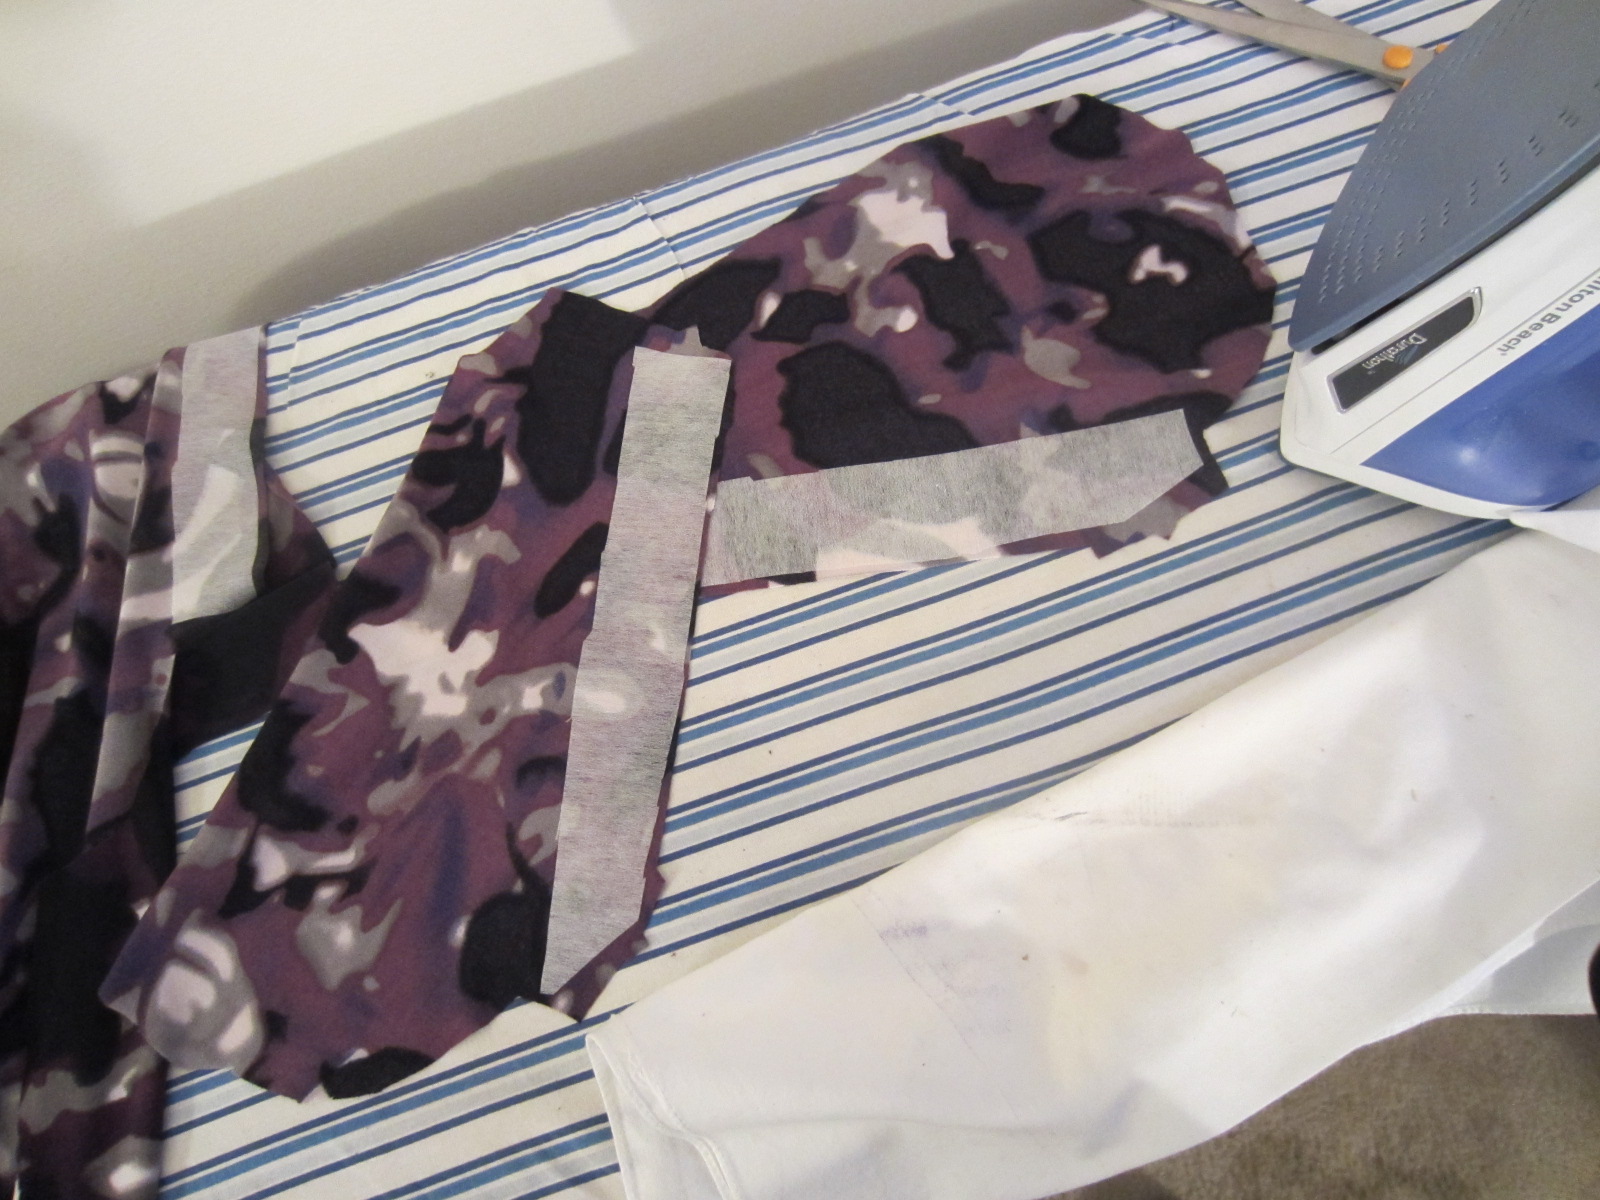
So I began my adventure of taking the seams apart...
 
 
Once apart, I cut the waistband also.

 
The pockets had to be trimmed and taken in to accommodate the resizing, or else I'd be sewing through a HUGE stack of leather - not a good idea.  It would also compromise the integrity of the seam at that point if I was going through so much.  So I marked the one inch in, sewed a seam and trimmed it.

 
Now I'm ready to sew the side seams... No pins - they totally don't go through leather!  when sewing leather you use clips - see below. they worked perfectly.  I had marked in ball point pen a trail of dots at one inch away from the previous seam line, and then drew out the taper line between the 13 and 19 inch marks.  This all mapped out my sewing line.  There was a spot - where the back yoke seam is - that i had to go real slow because it was thick.  I had issues at times with the thread breaking, it sort of shredded up on itself.  I used acrylic embroidery thread, because I was told to stay away from cotton, and not only do I have tons of embroidery thread, I surmised it would be a good choice for strength, and durability.  Even tho I had a few issues, I still believe I made a good choice.  This leather was thick, and I probably would have had the issue anyway, due to the fact that I am on a domestic sewing machine... Oh yeah - I did use a leather needle.

 
And so begins the sewing - Let's go for it! I really needed to feel comfortable because with leather you can't keep resewing over the same spots, as it weakens the leather.  The reason I was comfortable with this alteration was that I would be sewing fresh seams in this hide as the alteration progressed.  The only area of concern was the zigzag stitch for the waist, I needed it to be strong, but it couldn't be too close together to weaken the leather.  I hope the stitch settings I chose were wise.

 
So the side seams were finished and time to work on the waistband.  Needed to cut out the matching portion so I would be prepped for the assembling stitch.

 
I stitched a sample on the scraps to see if my settings were in the ball park and see what they looked like.  Looks good.

 
Okay side one is done. The critic in me didn't like the final result on this side, but I can't redo it, due to the weakening of the leather I mentioned earlier.  I will need to accept this.  I will tell you the other side came out fabulous... :-)

 
So, let's see now.. Did we do all this correctly?? Did we get from a 38 to a 34????

 
YES!!!!!!!!  Wooooo Hooooo!

 
Now the real test - Do they fit the user??? - Oh Yes!!!!! they do!!!!  I can't tell you how thrilled I am with this project!!!!  Do you know I had a few nay sayers that told me this couldn't or shouldn't be done....  I just knew I should be able to do it!  (My husband knew I could way before I did!)


Remember the before picture? All that room in the waist?   Ha!!! now look!


Here is the other before/after picture - How about that!!!!
+
 
Hubby loves his altered jeans and he said he's real happy now that he grabbed the 38's while they were still in stock, they are now officially a discontinued item, so it was even more unlikely for him to find a pair in the original size he wanted....
 
He's going to wear these tomorrow on his ride....
 
He told me it was a job well done. Hip Hip Hooray for me!
 

November 11th

 
Well they passed the riding test today!  One item of note was the front pockets.  Remember that I had to take them in? Well, by taking them in that inch, it made the pocket opening too small for his hands to fit comfortably, so that part of the seam ripped. I will need to leave that portion mobile on the pants and just secure the seam underneath and above to avoid further seam unravel, and we're good. 


It doesn't look bad when you're glancing at the jeans.  Unfortuanatley the holes will be there, unless i get a leather repair kit.  No one is inspecting them!!!  Even with the tiny tear they wore well on the ride today!
 
I still take the Hip Hip Hooray!
 
Ciao!


Christmas/New Year's Dressy Sew-Along

Another Piece from a Forum Thread...


Well the gals at the forum started another Sew-Along for Christmas/New Years "Dressy" sew-a-long.  I am going to take part in this one also, aside form my 6PAC because I need a dress for my office holiday celebration in December.  I always do something special for everyone for the party, just so everyone has a gift to open...I've already begun thinking of what this year's plan will be.  I can't put it on my blog because some of my colleagues in the office read the blog and the surprise will be out...But I've got some ideas brewing...:-)  

So the sew along developed the other week, and I've found my fabric and a pattern that I want to sew.  The Fabric is a gorgeous Red Velvet knit, and it's got gold snowflakes on it - I figured very festive...

 
The red color is very rich and the velvet is beautiful  I chose the two patterns below, I am leaning towards the New Look 6802, view D with View A sleeves.  I like the twist on the front - I've never attempted anything like that before, it looks like it would be flattering,  I do like the cap sleeves on the View C, but would like long sleeves on this dress I think.  I'm not big on short sleeves - especially in the office - whether it's summer or winter the office is always chilly.

 
Well I have 2 pieces of my 6PAC done - I think I started before the starting gun went off, but I don't think they will ban me - this one wasn't a contest, this was just s sew along, so I think it's a little more lenient, plus it was my first one, so I'm not even sure if I was early or not?  Not to worry... Have to do my jumper and 3 more turtlenecks.  Still missing the 4th material. Here is a place for mega gorgeous fabric - hey that's even its name - "Gorgeous Fabrics" I saw some real interesting knits on there the other day. 
Well I will keep adding to this post when I start the Dress.  Right now I'm hunkering down for Hurricane Sandy.  Hoping we won't lose power for too long, since it seems inevitable that we will lose it for some period of time.  Going to the Library to pick up my books so I have something to read when out of power...  I put some Grisham's on hold.

Ciao!


November 9th

 
Well SuperStorm Sandy really hit NY and NJ, but we didn't get much at all. Only lost power for a short period of time maybe 2 hours or so.  We were blessed.
 
Well I started cutting out my pieces today, I would like to start my dress this weekend.  I have planned a lot for my office party and so I'm in the mood.  I made a game for them to play I really think it is going to be a hit. It is a craft sewn project.  I've played it to make sure it works and I've had fun....then I shopped for some decor and stuff like paper plates, cups, that kind of stuff.  The gifts I'm doing up for them all the pieces are due to arrive tomorrow, I designed the graphic for them, and then I'm personalizing them with their names embroidered.  Can't tell you yet, just in case a colleague reads this blog before the party! That's why I didn't describe the game either!... 
 
So cut the pattern and then all the fabric.  This fabric being a nice velvet, has nap, so I made sure I cut it all so the nap was "brushing" downward.  I still do not know all of the technical terms; I will pick those up as I go along....I am going to do the puffy capped sleeves, but then make them long sleeves, but not like the sleeves in view A, I don't like those.  These sleeves will be form fitting to my arms, and real long, the way I like them.  Well I will be ready to start sewing in the morning.
 

November 10th

 
Well, had fun putting this together this morning.  Went together without a hitch.  I tell you though, there were parts that i needed to draw on past skills to understand the directions... Also I made the sleeves long like i wanted - I gave them a cap at the top which I'd never done before, but now that I know I'll be using that technique again!...  I'm getting more comfortable deviating from patterns and putting together pieces that I want, to make the item that I want to end up with.  So, I made the bodice twisty piece, which was neat - i like that technique, too.
 
 
Then I sewed up the sides....
 
 
All together... It looks OK hanging on a hanger, but the sleeve caps get lost, so i better get dressed and model it....
 
 
And of course my sleeves are nice and lo-o-o-o-o-o-o-ong...
 
 
So I took this pattern and made this dress with the sleeves... It's only a coincidence that they are both red  :-)
 
 
Here is a close up of the twisty part...  I like the style, I think I'll be calling upon that again in the future...  The pictures don't show how sparkly the fabric is, the gold snowflakes are glitter and the sun sparkles off of them... real pretty.


All Done!!!!
 
 
------


10.26.2012

Piece 2 - 'Striped' Turtleneck

My 6PAC 2nd Piece - Turtleneck # 1


Well, the thought of the jumper was daunting this morning and I wasn't sure how to go about it yet, so I figured I'd try one of these turtlenecks.  I'm going to try the red/purple stripe knit.  Kwik Sew #2900.  This is my first stripe piece, so I'll take care.  I'm going to do size Small again because it seems Kwik Sew fits me in pattern S.

Well the fabric was already washed - I do it right away when I get them home, so I'm ready...

I laid out the fabric in a way that when I cut the front and back panels the idea was that when they join, they will match and make a continual line around the top.  I think this will work out.


Got my pieces cut and also cut some cuffs for my sleeves, because I like cuffed sleeves, and I also like l-o-n-g sleeves, so by cutting the sleeves the length that the pattern is and adding the cuffs, I figure I should be good.

 
Well this pattern I am getting to learn how to use Overlock stitch - it's my first time.  It's a really kewl stitch - I like it.  I guess it's like what a serger would do, I mean it's a beautiful clean finished off seam - I can totally see why people love serging.  I installed the front to back panel and put in the collar.  The collar was a little tricky since you are stretching it, and the knit is curling, and you have 3 pieces to capture into the overlock stitch... I came through it okay.

 
Here is a closeup of the overlock stitch - real nice, right?

 
The collar fits perfect size.... there is a slight pucker on one side of the shoulder, I will ask the forum what that is from so I can avoid it in my next top. I am pleased, however, so far that this is coming out nicely. Next is the assembly of the arms, then the cuffs, then the bottom hem, and I'll have my first ever turtleneck!  I am sewing 4 total, part of my 6PAC, because I desperately needed turtlenecks, and couldn't find any in the store that I liked, not to mention, that no turtleneck I've ever purchased have I been satisfied with. The sleeves were always too short, or too loose, and the top never fitted nice...  Now I can select the fabric choice and make the shirt to my liking - is there any better way to go??  See my example below...
 

The black gym pants are *not* being pulled up that is where they fall on me.   hhhrrrmmmppphh!  See the lounge pants I made from football fleece? now that's what I'm talkin' about!  Mind you I am 5 foot 6 1/2, so It's not like I'm super tall or anything, that these normal items should be short, I just like long things I guess...  I think I am considered average height and build.
 
 
Anyway, the overlock stitch is good for knits because it allows the fabric to stretch after it's sewn, otherwise, you'll need to stretch the fabric as you sew.
 
More after I get the arms in and finish her off... Right now I'm going to surf for a while and watch movie with DH...
 

OK....  Done!


Notice my nice l-o-n-g sleeves :-)  This turtleneck will go perfect with my black jumper that I'm making.  I received the 4 swatches from fabric.com that I was going to make a selection out of for my 4th turtleneck, but I wasn't convinced about about any of them.  However i found some fabric TDF on another site... $$$ but gorgeous and right up my alley. Might have to splurge. gotta have some TDF pieces - even if the pieces are basic the fabric can be exquisite!  Now I've convinced myself....
 
Well I'm pleased with my new turtleneck! can't believe it's taken me so long to make one!  I owe it to my new sewing circle - the Stitcher's Guild (Artisan's Square) they have given me inspiration.
 
I was chatting it up with Liz the other day from my office, and she could tell how excited I always am talking about my sewing adventures.  She great to chat with.  I was wearing my new jumpsuit and when I stood up and said "so what do you think???" she gasped and said "No! - you didnt' make that!"  :-)  She said she would love to sew outfits for her little ones, but she can barely even get time to herself to work out in the exercise room!  It must be real fun making little one's clothes. 
Well that's it for now....
 
2 down, 4 to go!


10.21.2012

6PAC Piece # 1 - Jumpsuit

Started my 6PAC... my Jumpsuit


I will just keep adding to this post as my 6PAC progresses.  So far I am going to start with my perceived hardest piece.  The jumpsuit.  KwikSew # 3898 View B. My fabric: Purple & Black  Poly/Rayon/Knit.  I am still learning about my fabrics, so unless I remember what the bolt said, I can only describe what I THINK the material feels like to me.  I am hoping this material is suitable for this jumpsuit and will not just hang with too much gravity and have no shape to it when I'm done.  This is the jumpsuit that I wanted to do about a year ago, and never got to. the 6PAC has given me life and I've out this back to the front burner to challenge myself to get'er done.


10/21/12:  So here goes my 6PAC Adventure.  Started yesterday by cutting the pattern out.  I'm going with Size S because I made a Kwik Sew overalls last year in size M and they were huge! so I'm thinking these pattern run large.  I hope!

Step One - The cutting of the Pattern


Step Two - Iron the pattern pieces
 
Step 3 - lay the pieces out and pin and then cut fabric - better line up that leg better - sure doesn't look like the grain line is true, does it?  :-)
 
So guess what??? I got the pieces cut but I pulled a muscle in my back with all that leaning over pinning and cutting both the pattern and the material, so now the rest of the day I was on bed rest and I'm laid up today again!!!! So my start is stopped!
 
Well It's football Sunday today anyway, but, my back being out is no fun, no matter what!  I had to go shopping this morning, but that was tough so i only got the basics, and DH will only get a light game food menu today, I am settled in my chair... Well, hope this gets better fast, cause i need to get back to the machine!!!! Gotta get started... 5 more pieces after this, no time for down time!!! :-)
 

Monday October 22nd

 
Yaye my back got better while I was at work!  I was ready to sew tonight woo hoo!.. So I started my jumpsuit...
 
First, had to apply all of the interfacing.
 
Here's a picture after the back pleat was sewn in and the yoke was installed on the top back
 
 
Well, the top is complete, except for hemming the sleeves, and i tried it on... perfect size, so I was right to go with the size small... That's a relief!  The fabric felt so nice, too! I was worried that the hand was going to be too "slinky" for this jumpsuit, but I now think it will be just how I imagined it when I first picked it out a year ago!  and the poly fibers made it feel warm, too, so it will work for this time of year.  I was on my forum at Stitcher's Guild and read a thread on knits and they talked of poly knits, and how back in the day they were "plasticky" well this one is far from that for sure! It is very soft and felt great on my skin.  They joked about how it "hurt to hug grandma" (scratchy)  LOL  I, too, remember that growing up and even remember wearing some of those poly's!  Yuk!!!

Here's a picture of the back.
 
Here is a close up of the yoke and shoulder. They both have top stitching.
 
Did I tell you that the Turtle neck pattern came today! kewl, huh? I'm psyched!  I am waiting on some swatches from Fabric.com in order to choose my 4th fabric for my 4th turtleneck.  I am going to make the jumper dress 2nd anyway and the turtlenecks last.  I am very pleased with how the jumpsuit is coming along...I may not be sewing at the super high levels of my new friends at the forum, but I need to start somewhere and perfect my newbie skills before moving up to intricate pieces like this woman Ann.  Check out her red vest and Blue top -they are TDF. 

 She has details on it on her blog Here:Ann's Blog .
 
Well that's it for tonight...going to start on the next steps tomorrow after work.. Will update after that.
Cheers!
 

October 24th

 
Well, I finished my Jumpsuit! How about that! It was one year in my stash, now done! DH gave it his stamp of approval... After assembling the bodice, the first day, I assembled the bottoms on Tuesday.  I might tell you I totally worked right through dinner, lost in my sewing cave, and DH had to whip something up and remind me to take a break and eat!!   Here I installed pockets, too.

And an good handful of buttonholes....

As I said this fabric, notions, pattern were from a year old stash, and I can see  I had a different view back then on which buttons were the best choice for this, but that's minor and I can change that any time!  They are nice buttons, but if I was doing this all now, I don't think I would have settled for these...

The pattern called for waist casing and buttonholes for the openings for the ribbon to come through on each side.

This is very comfortable to wear~ If I drive tomorrow to the office (as opposed to riding my motorcycle) I would like to wear this!


This was real fun to make! It is my first piece of my 6PAC, and I will be starting on my Black Cord Jumper this weekend, or next week.  Probably at least cut the fabric on Saturday...
 
All told, this took: 2 1/2 hours to cut the pattern and the fabric pieces, (with a quick lunch break in between), then 3 1/2 hours to complete the bodice (while cooking rotisserie chicken and rice), then 4 1/2 hours to complete the bottoms, and assemble them to the bodice - Heavy concentration on this segment..., and the final 1 1/2 - 2 hours making the button holes, installing the waist ribbon, and attaching the buttons. so about 12 leisurely hours & Wah-lah!
 
I will make this pattern again in a different fabric, because I love the pattern and results~.  I will make an adjustment possibly for the neck/collar, but if the material has more weight, I might just leave the pattern as is.  Now that I'm done with this one, I'm thinking that the jumper might be the hardest of the group... :-)
 
Check out my next post on the Jumper when I start it!