Showing posts with label Accessories. Show all posts

3.06.2013

SWAP Accessory....

Faux Leather Hair Glove


A Hair Glove is a wrap for long hair when you are riding a motorcycle (or any other motor sport, too).  I have real long hair, so I have trouble finding long ones for my hair. the longest I usually find is 8 inches. that covers about 1/2-2/3 my hair.  Then try finding one that is "nice" and not plain or with flames or skulls on it.  So....Let's make our own.  Plus I wanted to make a matching one since I have the outfit I made now.  Here is the one I already have been using:

 
This is how much hair it covers:
 
 
Yup, about 1/2....  I don't really want only a tube going down my back, so I won't make it double the size, just maybe 25% longer - another 2 inches should be good.
 
 
It closes with snaps...

/
 
And has a hook to catch on a ponytail holder that is wrapped around the top of the ponytail.


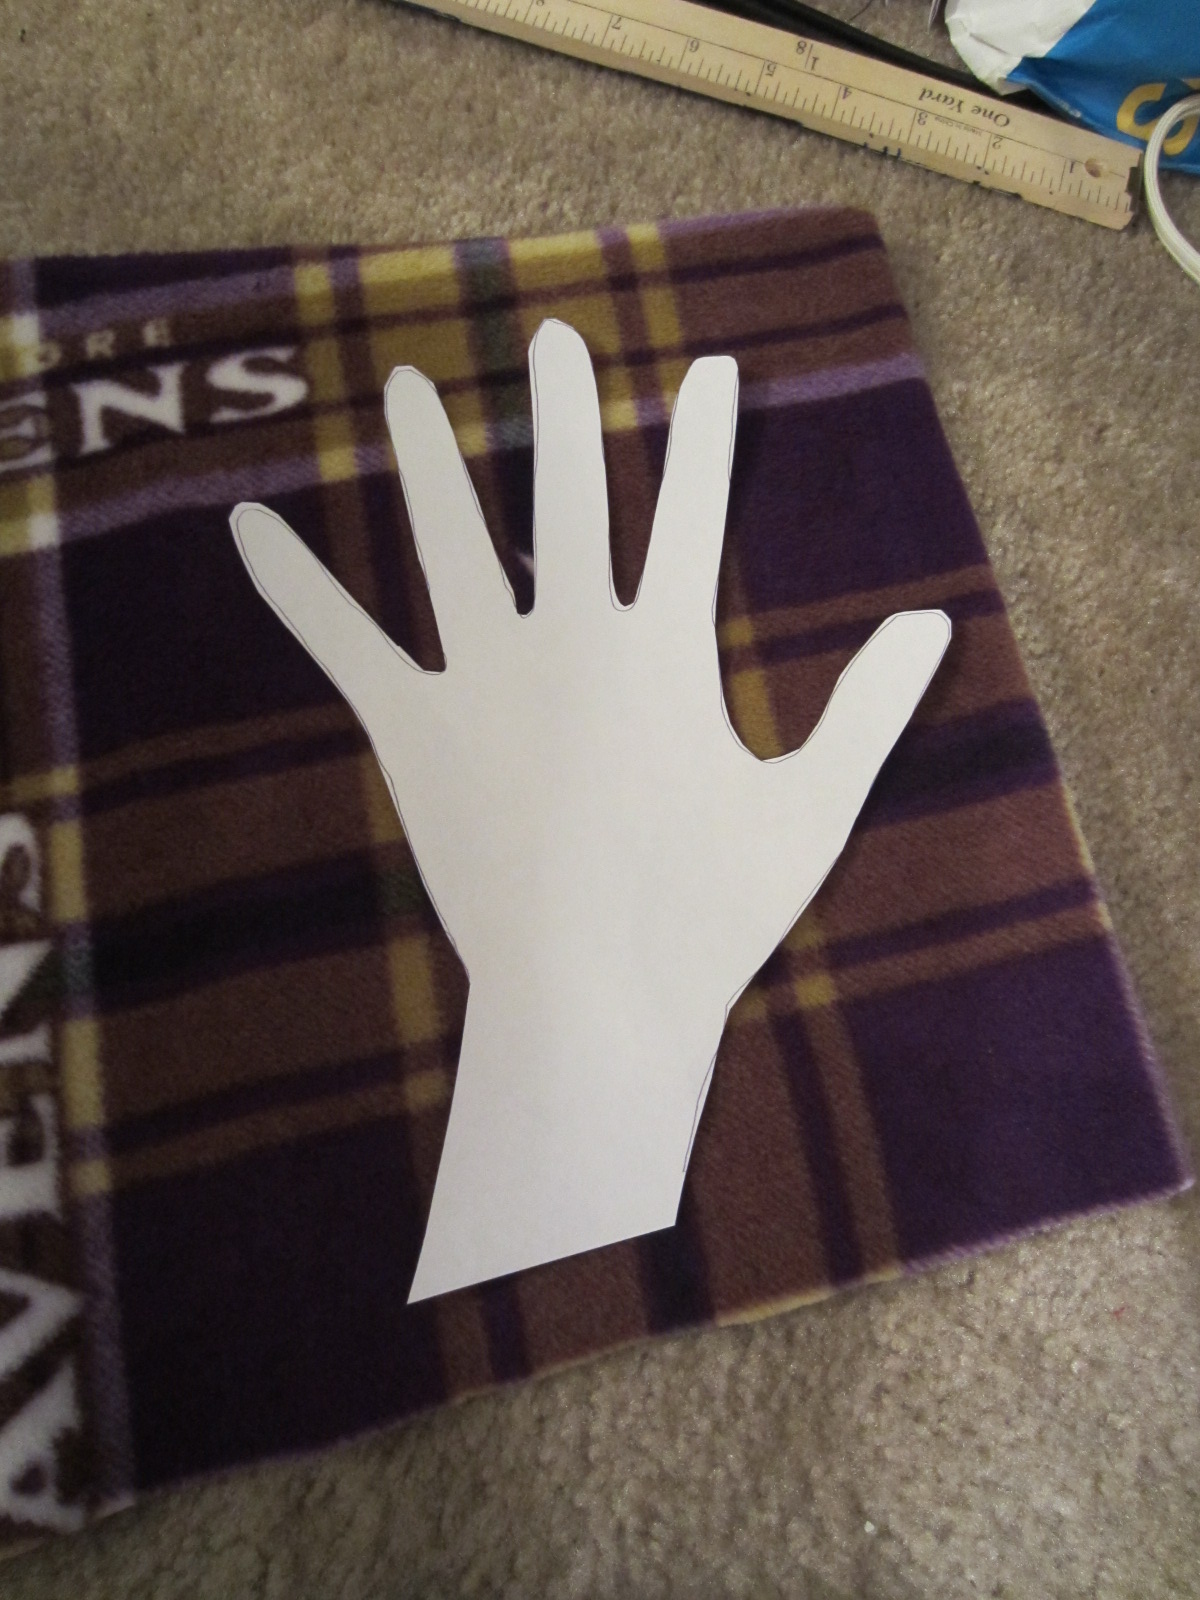
This one is 8" my new matching one will be 10".
 
 
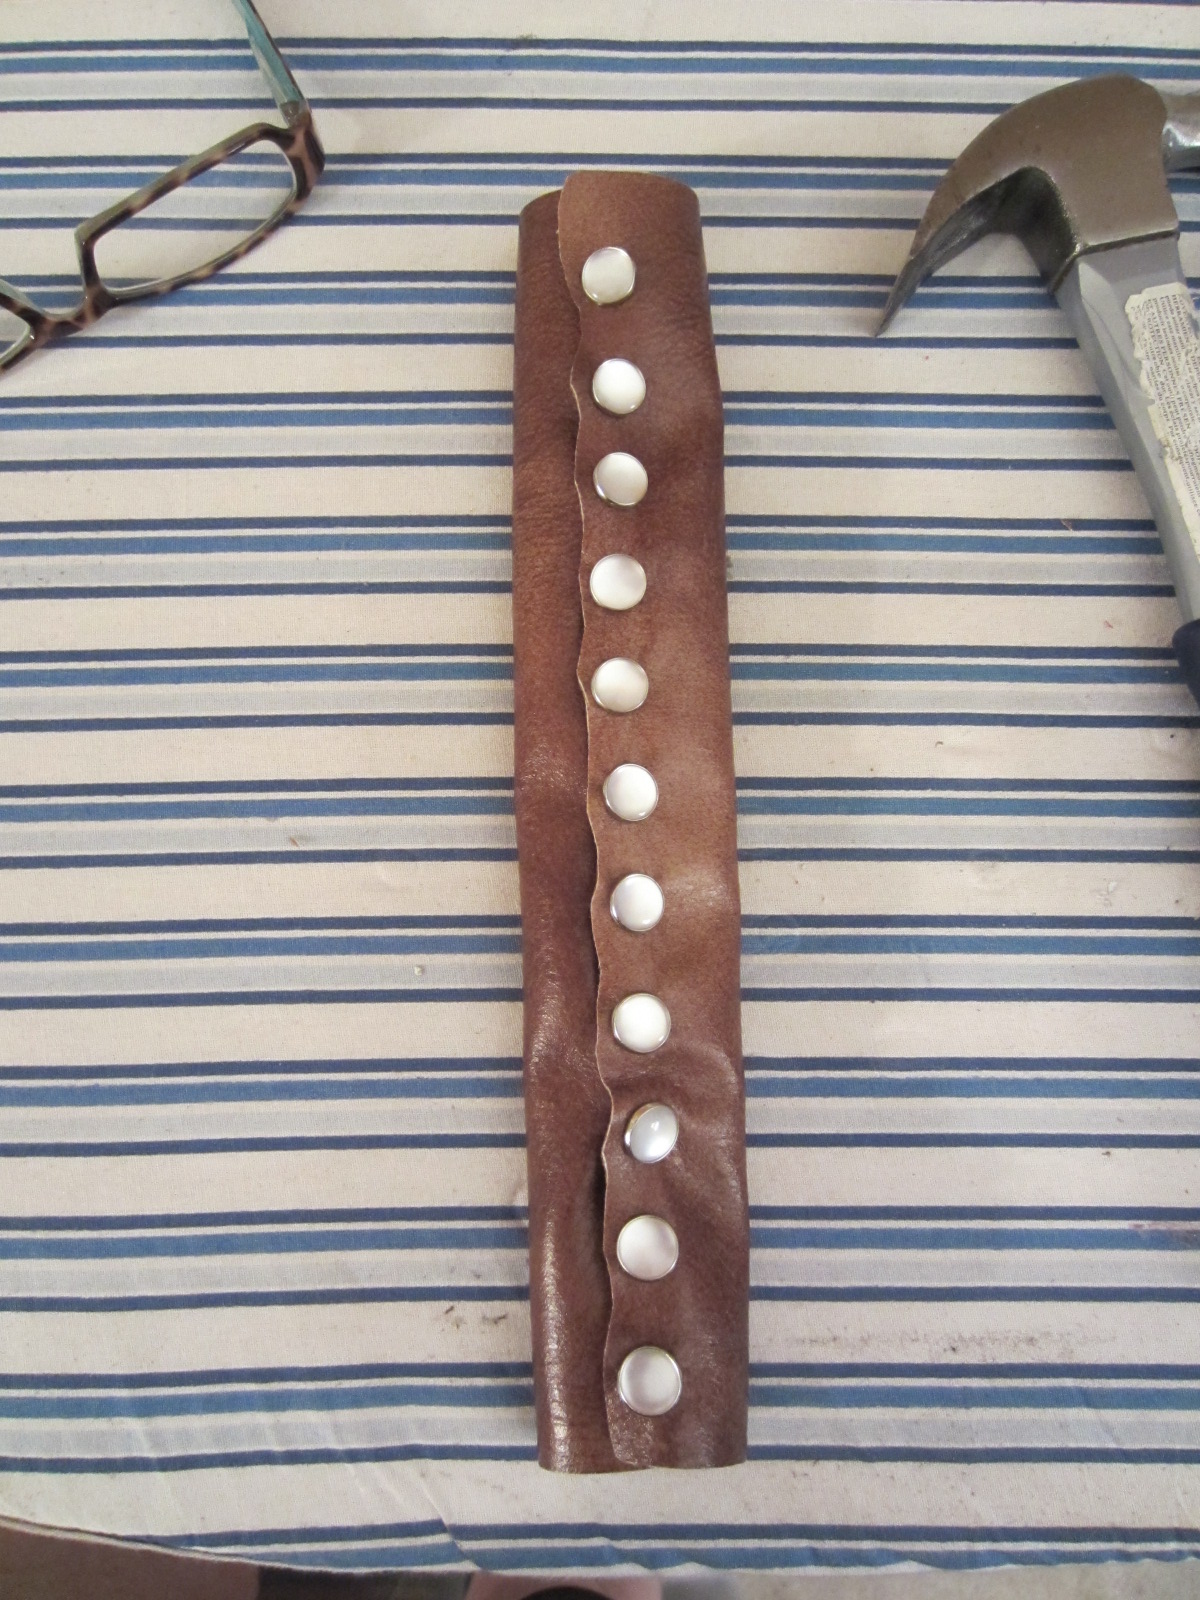
Then Mark where the snaps are going.. I think I did 7/8" apart, down the length of the glove.

 
Start the installation.  Rocky start - first time with these type snaps, but smooth sailing after the first one...

 
These went on with a hammer and a thread spool, and utilized a pencil eraser to push the fabric onto the claws of the snap pieces before hammering the base pieces onto them.

 
So, installing the catch I found a covered large hook and eye set, that the hook would be perfect for.


Sewed that in place - it needs to be a little off center to end up proper on the glove when closed and wrapped.
 
/
 
We are ready to go to JA's for embellishments... Beads of a sort to top this off... (it's a clever way to hide the sewing on of that catch) :-)

 
Three strands of shells, and one floral piece.  There were many choices in the brown section, but I like the look of these the best for my glove....

 
In action:
 
 
Comparison:
 
 
I can place the glove a little lower on my head by starting the ponytail a little lower on my neck. Then we'll cover even a little more hair, but I like the extra coverage I obtained with the extra 2 inches.  I will be making a wine denim one also to go with my denim motorcycle outfit.
 
Cheers!
 
JDol


12.16.2012

Hobo Fat Quarter Bag

Love this Bag!


Well as if making a set of Ravens Winter Accessories last night wasn't enough, I sewed up this Hobo Fat Quarter Bag as well.  My Inspiration was: This Tutorial.  I printed it out, and read it, went to JA picked up 6 Fat Quarters, and put them aside to start later.

So I started and putting 3 fat Quarters together across was 63 inches and looked HUGE so I began to deviate from anything that any pattern said and my bag took on a life of it's own.  Since I kept going with no idea what was coming next really, I didn't end up taking pictures, although I wish I had - it would have been fun to watch how this developed.  Anyway, I kept the basic idea of the bag, but I made this without looking at any directions...Which I'm proud of.  The bag is BIG... can fit a lot into it... but the stuff better be light! I love the look of it tho.

 
The Pieces....

 
Side One

 
Side Two...

 
Close up of the "Handle Channels" There are 3 on each side of the back.  There is elastic sewn in the top of the center panel.

 
A shot to help show proportion...

 
The other side

 
Just "Plopped" on the floor

 
I think this will be a fun bag!
 
Ciao!

Ravens Winter Accessories

Stay Warm!


Well,  It was Saturday and I was stuck all day...Didn't want to start a big project yet, so fumbled around all day looking at tutorials, reading the forum, straightening the sewing room, looking over my project list... Finally around 6 pm got motivated to make my Ravens Accessory Set....Hat, Gloves and scarf. Had to make a run to JA for the Ravens Purple yarn to make my new favorite Ruffly Yarn Scarf I learned from This Tutorial.  I already had some left overs to make an easy as pie Pom-Pom Fleece Hat I found at AllFreeSewing.com Made by Emi Harrington: "How to sew a Fleece Hat"  (Tutorial Video Here)  And the Gloves, well I'm making those up as I go along.

I started with the hat. Had a scrap big enough to use, cut an 11 x 21 3/4 piece. The "Ravans" couldn't be centered becuase of the way the scrap was cut and needing the 11 inches, so the back seam when I'm done will be a little off center... I can live with that.

 
I chose to use overlock stitch to sew the seam closed to make the tube (right sides together)

 
Turned right side out, and turned up bottom cuff twice.  The tute had a larger roll, and didn't sew it, but I had a shallow roll since I needed the word "Ravens" to show.  Since is was a shorter rollup, I decided to topstictch the roll, so it would stay in place amnd the wording would always be visible.


To make the Pom-Pom, Cut in on the top one inch in deep.  When you are at the and, cut out the seam piece of the fringe, so it is not bulky when you gather up the pom-pom.  Sew an elongated stitch (gathering stich but real wide) all the way around right underneath the fringe, with strong thread. you will gather the fringe up to make the pom-pom and wrap the thread around the bottom of the pom-pom the give it a solid bottom, and tie it off.

 
Be sure to pull the pieces out as you gather and tie up the fringe, and "fluff it out" and it will look like this

 
All done with the hat!


Next - The Gloves...

 
OK, admittedly I don't know what I'm doing and I don't want to do all those gussets because i tried that once and put it away after trying to sew the first seam.... So we are doing just plain seams, and turning.  So let's try one. 
 
Pattern of my Hand.  Lay it over the spot lined up to where I want the top of the hand to end up. I needed to sew about 1/4 to 3/8 of an inch all around the hand and fingers and also to sew about let's say a good inch above the fingertips of the pattern.  This I only learned after completing the second glove, which was better than the first, but which still needed improving.  So I didn't take pictures, but basically figured out that I should cut it out like a mitten (not all in between the fingers and what not) and just for the sewing in between the fingers, and then trim the seam allowance when done.  I also realized with fleece I need to make the palms pleather.


This are still not prefect the way i want them, but they are wearable, although a little sweaty maybe?  I will keep practicing the seams between the fingers... I think I will need to make a template with more space between the fingers for seams... I know cutting corners doesn't yield the right results, but I just can't do all those gussets yet...  One day I will try that again...


The Scarf....

 
So My Favortie new scarf tutorial was put to use again with a ball of 109 yards of chunky purple yarn to make a 45 inch ruffly yarn scarf.
 
 
Basically you are "Zig-Zagging" the yarn bit by bit, bunching it together, and sewing it down the middle...

 
I'm showing here the bunching, but I had to use one hand to hold the camera, so this is not the best picture... The more bunched you make it the sttronger your scarf will be.  (the shorter, too, so if you want long, you may need two balls of yarn)  Once you are done, go back and run another stitch down the middle over the first one (close to it is good enough here) to add  the strength...

 
Okay - now I have a set of Ravens Accessories... Yaye!
I wore them this morning to the store and the cashier remarked that I "Must be a Raven's Fan"  :-)
 
Here's the set...


Check This Out...

 
The Funny thing is... Now when I ride in my Jeep, I am even more of a matching set, because I made Seat Covers out of this fleece, so I match my Seat covers!  Who can say that????


12.09.2012

Sewn Ruffly Yarn Scarf

You Don't Need to Know How to Knit for One of These!


I came across this tutorial a few weeks ago on BurdaStyle, Sew a Ruffled Scarf and thought it would be great!  So I chose some yarn yesterday at JA and decided to try it.  It went along just as the tute said.  You will definitely need to sew a second strong stitch along the middle because i found just the one to be weak and it "ripped apart" I guess because it's hard to make sure your stitch is really grabbing the yarn enough to hold on.  I'm thinking if I bunched the yarn up more as i stitched down the middle, it might help hold the stitch better...it seemed I was not meticulous when it came to keeping that consistent going all the way down the scarf.  I bought 2 skeins - the other a Black & White, so I will try this again. Once I re-sewed those two places that had came apart, we were in good shape, and it's been good now. I had made sure i bunched them up good.  You will need to choose a Bulky yarn - or you might not get the fullness or ruffly effect.  The Yarn I chose was oh so soft and is real toasty around my neck.  It was 68 yds, and yielded a scarf of 1 1/4 yards, with me making the width about 5 inches.  It was rated 80g / 2.8 oz. (not that I really know what that means, but you might).  The total project was about 40 minutes....


It's funny, but when the yarn was rolled as it is when it's being sold, it sure didn't look like tarantula's legs...


The Next Day.... (today)


Well it's rainy out this morning and I have enough food for football snacks, so, I'm off to make my second scarf, of the black & white, so let's see if my new notes make a difference...

 
The beginning...

 
You criss-cross like this, so get a good handful of "rows"

 
Bunch them up together, and sew them up.. I used two hands to guide it through the feed, but needed one hand to take this picture....

 
So far so good...

 
The end... I was more conscious of "bunching" the strands up throughout the scarf this time, and with the 68 yds, I came out with a 43" scarf.  And BTW that second row of stitch to make it stronger--> don't sweat the fact that you will not find the exact middle seam that you made the first time around! the curly yarn will prevent that, where strands will lie on mis-strewn sides of one side or the other, but you will make a close path, and it will still be the strengthener.


All done!  It's so cozy!!!!!
 
This one took 30 Minutes....
 
Great to have a scarf made out of yarn even though I do not know how to knit!
 
Ciao!


11.23.2012

Black Friday Fringe Cowl

Black Friday Afternoon Project


Well I went to JA for Black Friday this morning, spent 2 hours there and stocked up on some fabrics for some projects.  The cutting lines were a little ferocious as evidently the fleece was a ridiculous price and folks had about 10-15 bolts per cart to cut! I landed a good place on line, and it moved fairly well, the only trouble i ran into was that after that and shopping for notions, i remembered i needed the trim for these cowls, and had to select it and then get another number and at that time I hit a longer wait.  Oh well... no biggie... I knew I wanted to probably start one of these cowls today, so i stood and waited.

So my cowl is inspired by Sandra from my Stitcher's Guild forum.  Her blog post about it is Here.  It is from a Soho tutorial from The Purl Bee - Pom Pom Cowl

My taste wasn't pom-poms, so I searched the trim section at JA for something that I liked.  I found a few, but some were very expensive... Then I found this silky fringe, like from the roaring 20's.  I really like it, so I got Brown to go with the gold pinstriped Brown linen, shown below, Red to go with the black linen, and gold to go with the beige linen.  It came out better than hoped.  The look is exactly what I was going for, and it is so comfy!

I fell in love when I saw Sandra's cowl, thinking now this is the best alternative to those turtlenecks I always want to wear in the chilly weather... this really dresses things up and keeps me warm... total shout out to Sandra!  You'll see on her blog how she is a master adjuster of all things wearable!

Sewed this up in about an hour 1/2, maybe a little more because lining up that fringe was tricky.  Will post the other two when they are done.


November 28th,

 
Well I made my second Cowl, Black with Red fringe.  I took more pictures this time along the way.  I also improved my method from the first time by pressing the seams first, then pinning and stitching the fringe to the cowl.  Went much smoother that way.  Here is a little story of pictures...
 
 
First, I started a little before this clock picture, say 5 minutes earlier.
 
 
First thing I did was fold under and press my seams
 
 
This way I get to line up the ends to see if they line up ahead of time, which was something i didnt' do on my first cowl, and I had to ease the ends together, which wasn't a big deal, but i figured I'd improve on this the second go 'round.  These didn't line up, so I opened the seam a little and re-pressed.

 
Like so...

 
Now I could lay the trim easily in the channel, and pin it for stitching.

 
I had to make sure those little strands were all tucked on the right side and not interfering!

 
Side one stitched! Nice!

 
While stitching I had to keep a hand gently guiding the fringe out to the side so as not to "catch" any on the underside, which did happen a little anyway, but it was minimal, and easily fixable.

 
OOoops!  had a miss on the end here! didn't catch the tape :) 

 
Pull out my trusty seam ripper so I can re-stitch this boo-boo.

 
Okay all better!

 
Finishing up side two, now to stitch the two sides together, press seams open, stitch the open seams down, and we're done!

 
Now the fun part!  Pulling off the fringe-stay plastic which was attached to help keep the fringe together and manageable until the project is done. This was fun but as you can see left a bunch of little lint bunnies.

 
Wrapped this up in about 1 hour 15 minutes-ish

 
Cowl Number Two!
 
My third one is Cream with Gold fringe. I will just pin a pic when that's done.
 
Thanks again Sandy for the outstanding inspiration!